

Lately we’ve been receiving a lot of questions about how we take photos and achieve a specific ‘look’. It’s taken time to develop our own unique aesthetic and it’s still constantly evolving. Also, it’s a joint effort! Jacob takes the majority of our photos and has a wealth of technical knowledge that I don’t. On the other hand, I edit all of our photos using my photography presets, which is also what contributes to them having a similar look and color scheme.
While there’s plenty to cover in the realm of photography, I thought it would be most useful to simply break down how we each shoot and edit. These tips will help gain an understanding of our processes and how you achieve a similar aesthetic with your own photos. If you’re just getting into photography, check out our post about how to choose the right camera and lens set up. You can also find a full breakdown of our camera, lenses, and other accessories in our travel photography gear.
How We Shoot (Jacob)
Camera Settings
Regardless of which camera we are using (Sony or Canon) we use the same settings. We always shoot RAW photos rather than JPEG. This is because RAW format retains far more information and gives you a lot more control when editing. It can be tempting to shoot JPEG to save on storage space, but don’t do it!
I always prefer to shoot in manual mode because it gives me the most control over the image. If you’re just starting out with photography, I recommend learning to shoot in manual mode first. This means you will have to set shutter speed, ISO and aperture for your image. Understanding how you can use the aperture and shutter speed to give your images a different feel is really important and it will make you a better photographer. It can take some time to become efficient in manual shooting mode, but it is well worth it.
Daytime shots
When shooting on a bright day, I keep the ISO low (between 100-400 ISO) to minimize any noise. I always keep the shutter speed fairly fast (1/250 second or higher). Setting the shutter speed this way minimizes motion blur and makes sure that any movement in the shot is still sharp (like if Selena does a hair flip!). Depending on the subject I’ll either want a shallower or deeper depth of field.
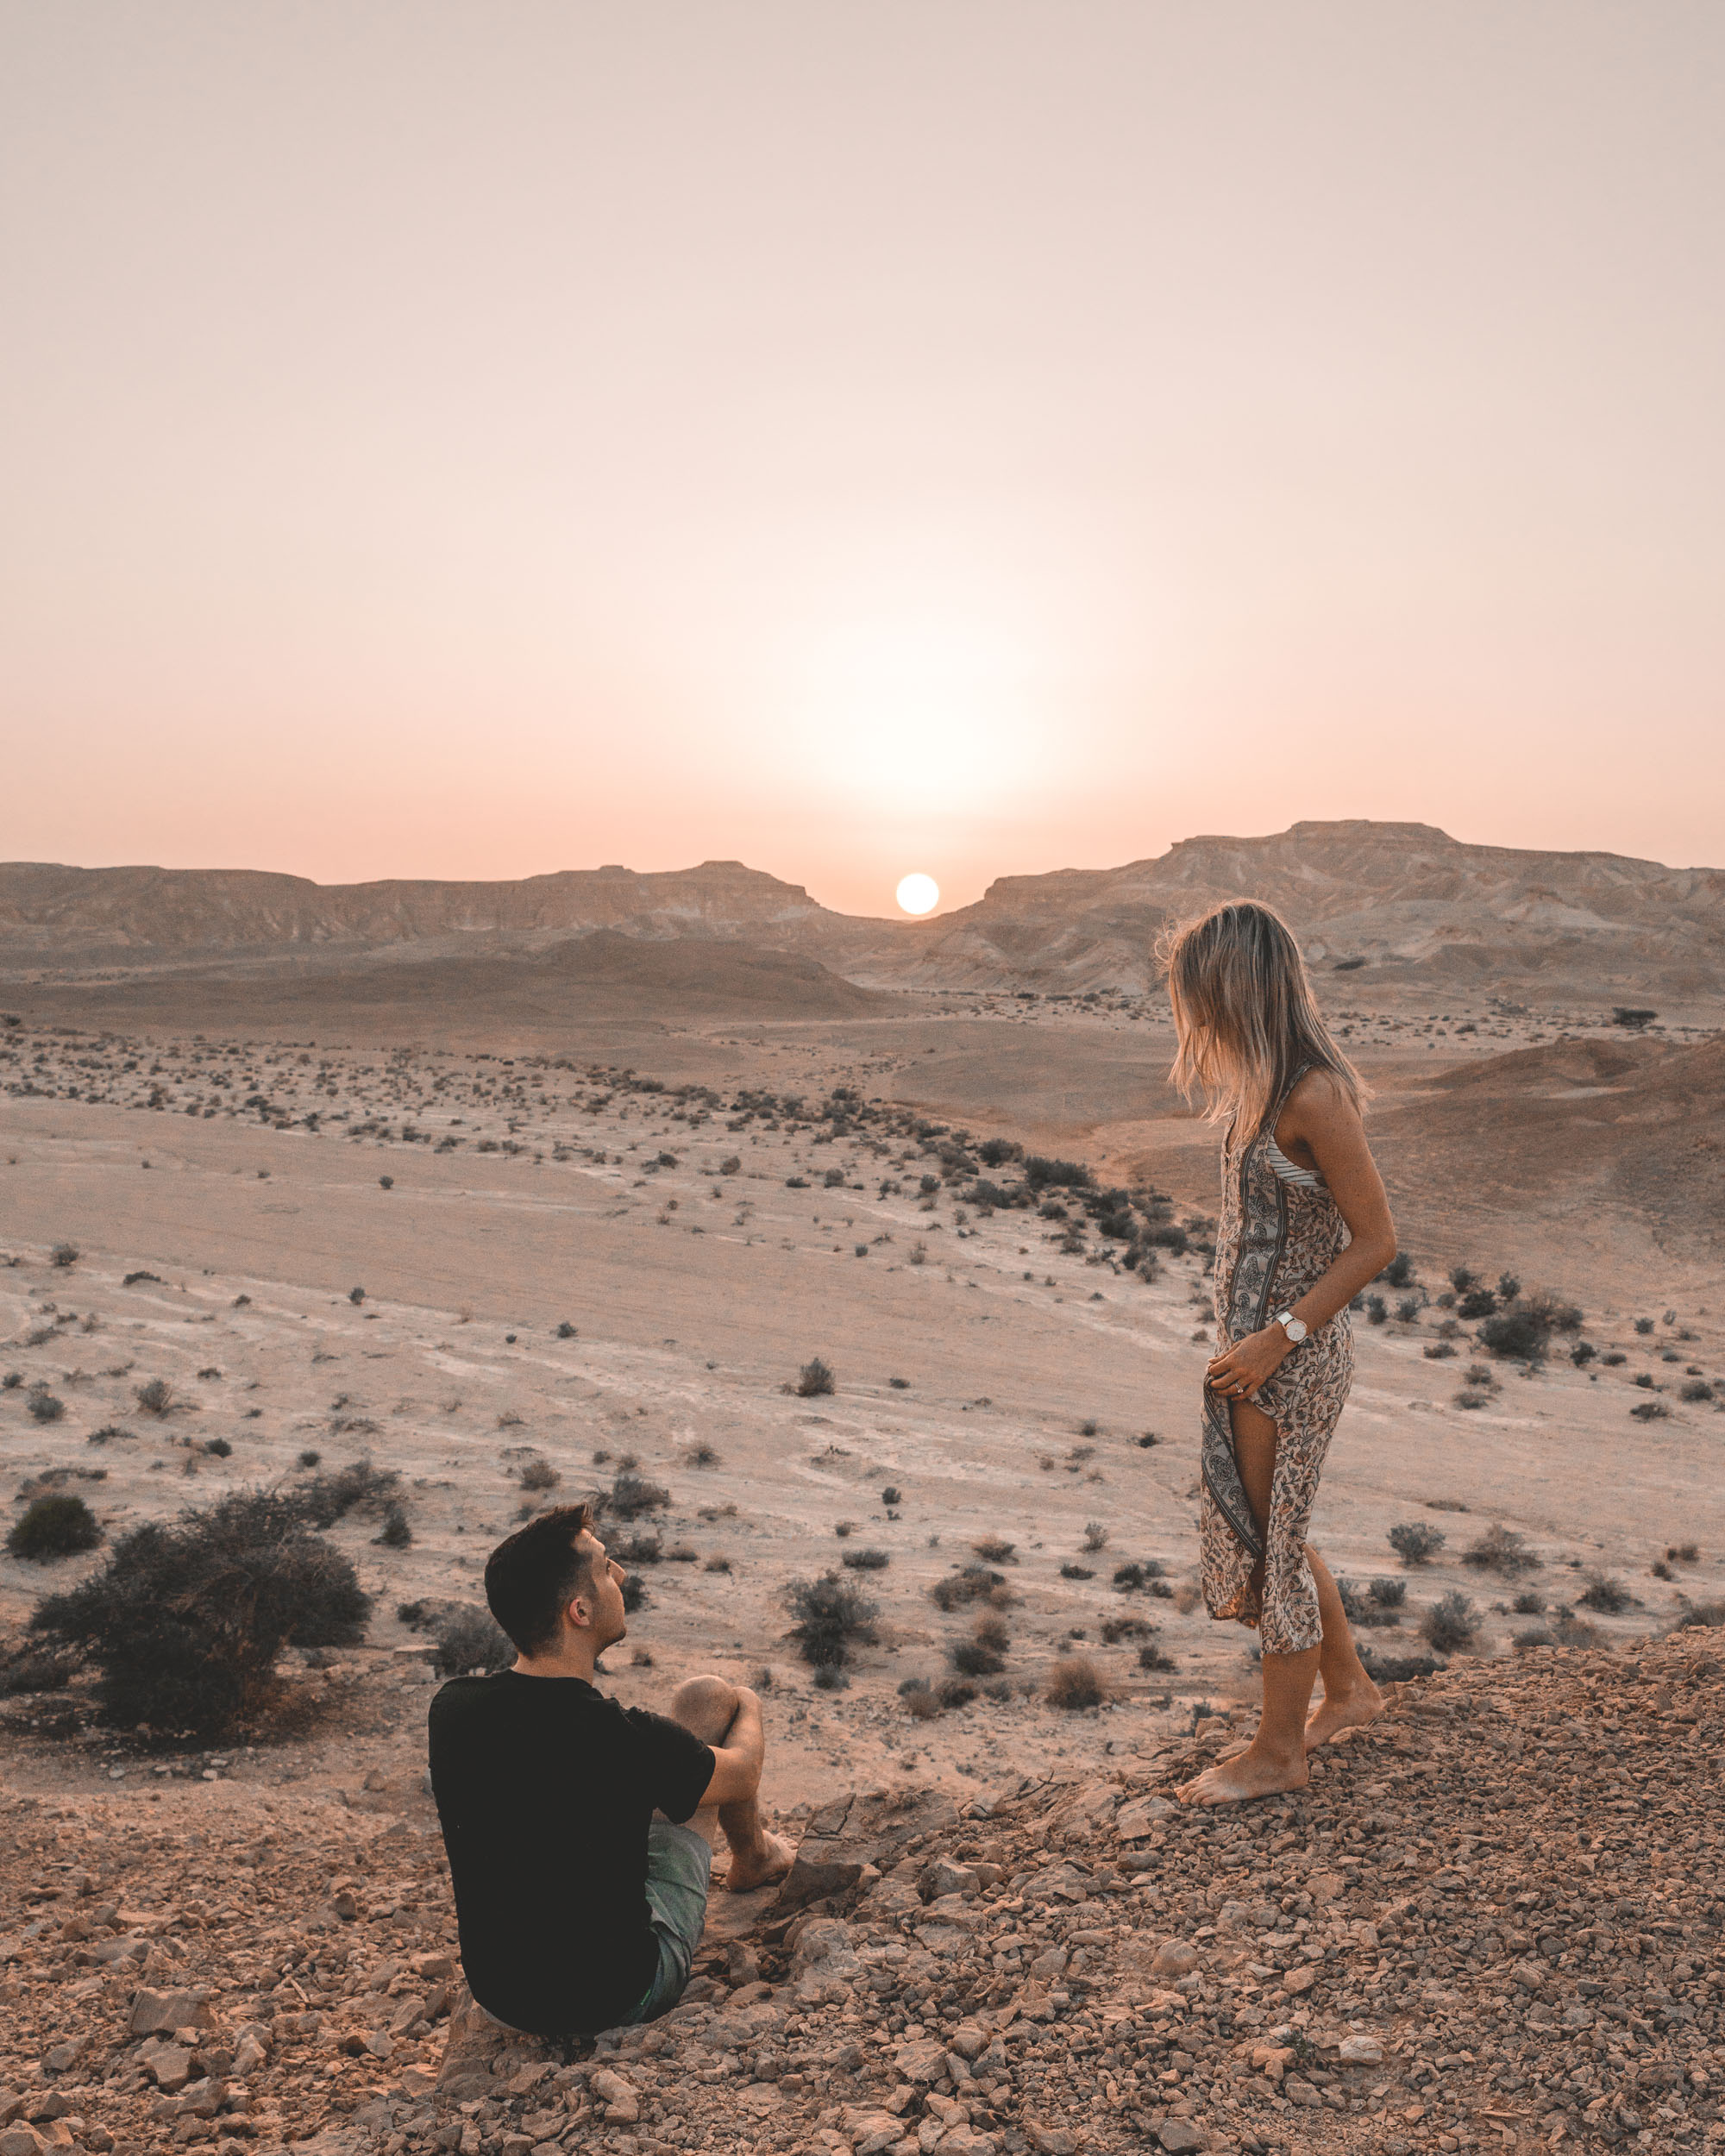
If I’m trying to draw focus to a specific object or person in the shot and create bokeh behind the subject, then I’ll shoot with a wider aperture (around f/1.4-2.8, like the Amsterdam photo below). This gives me a shallow depth of field. On the other hand, if I’m trying to capture Selena in a beautiful landscape or backdrop like the Palm Desert photo below, then I’ll want everything in focus. This means I’ll shoot with an aperture setting of f/8 or higher.
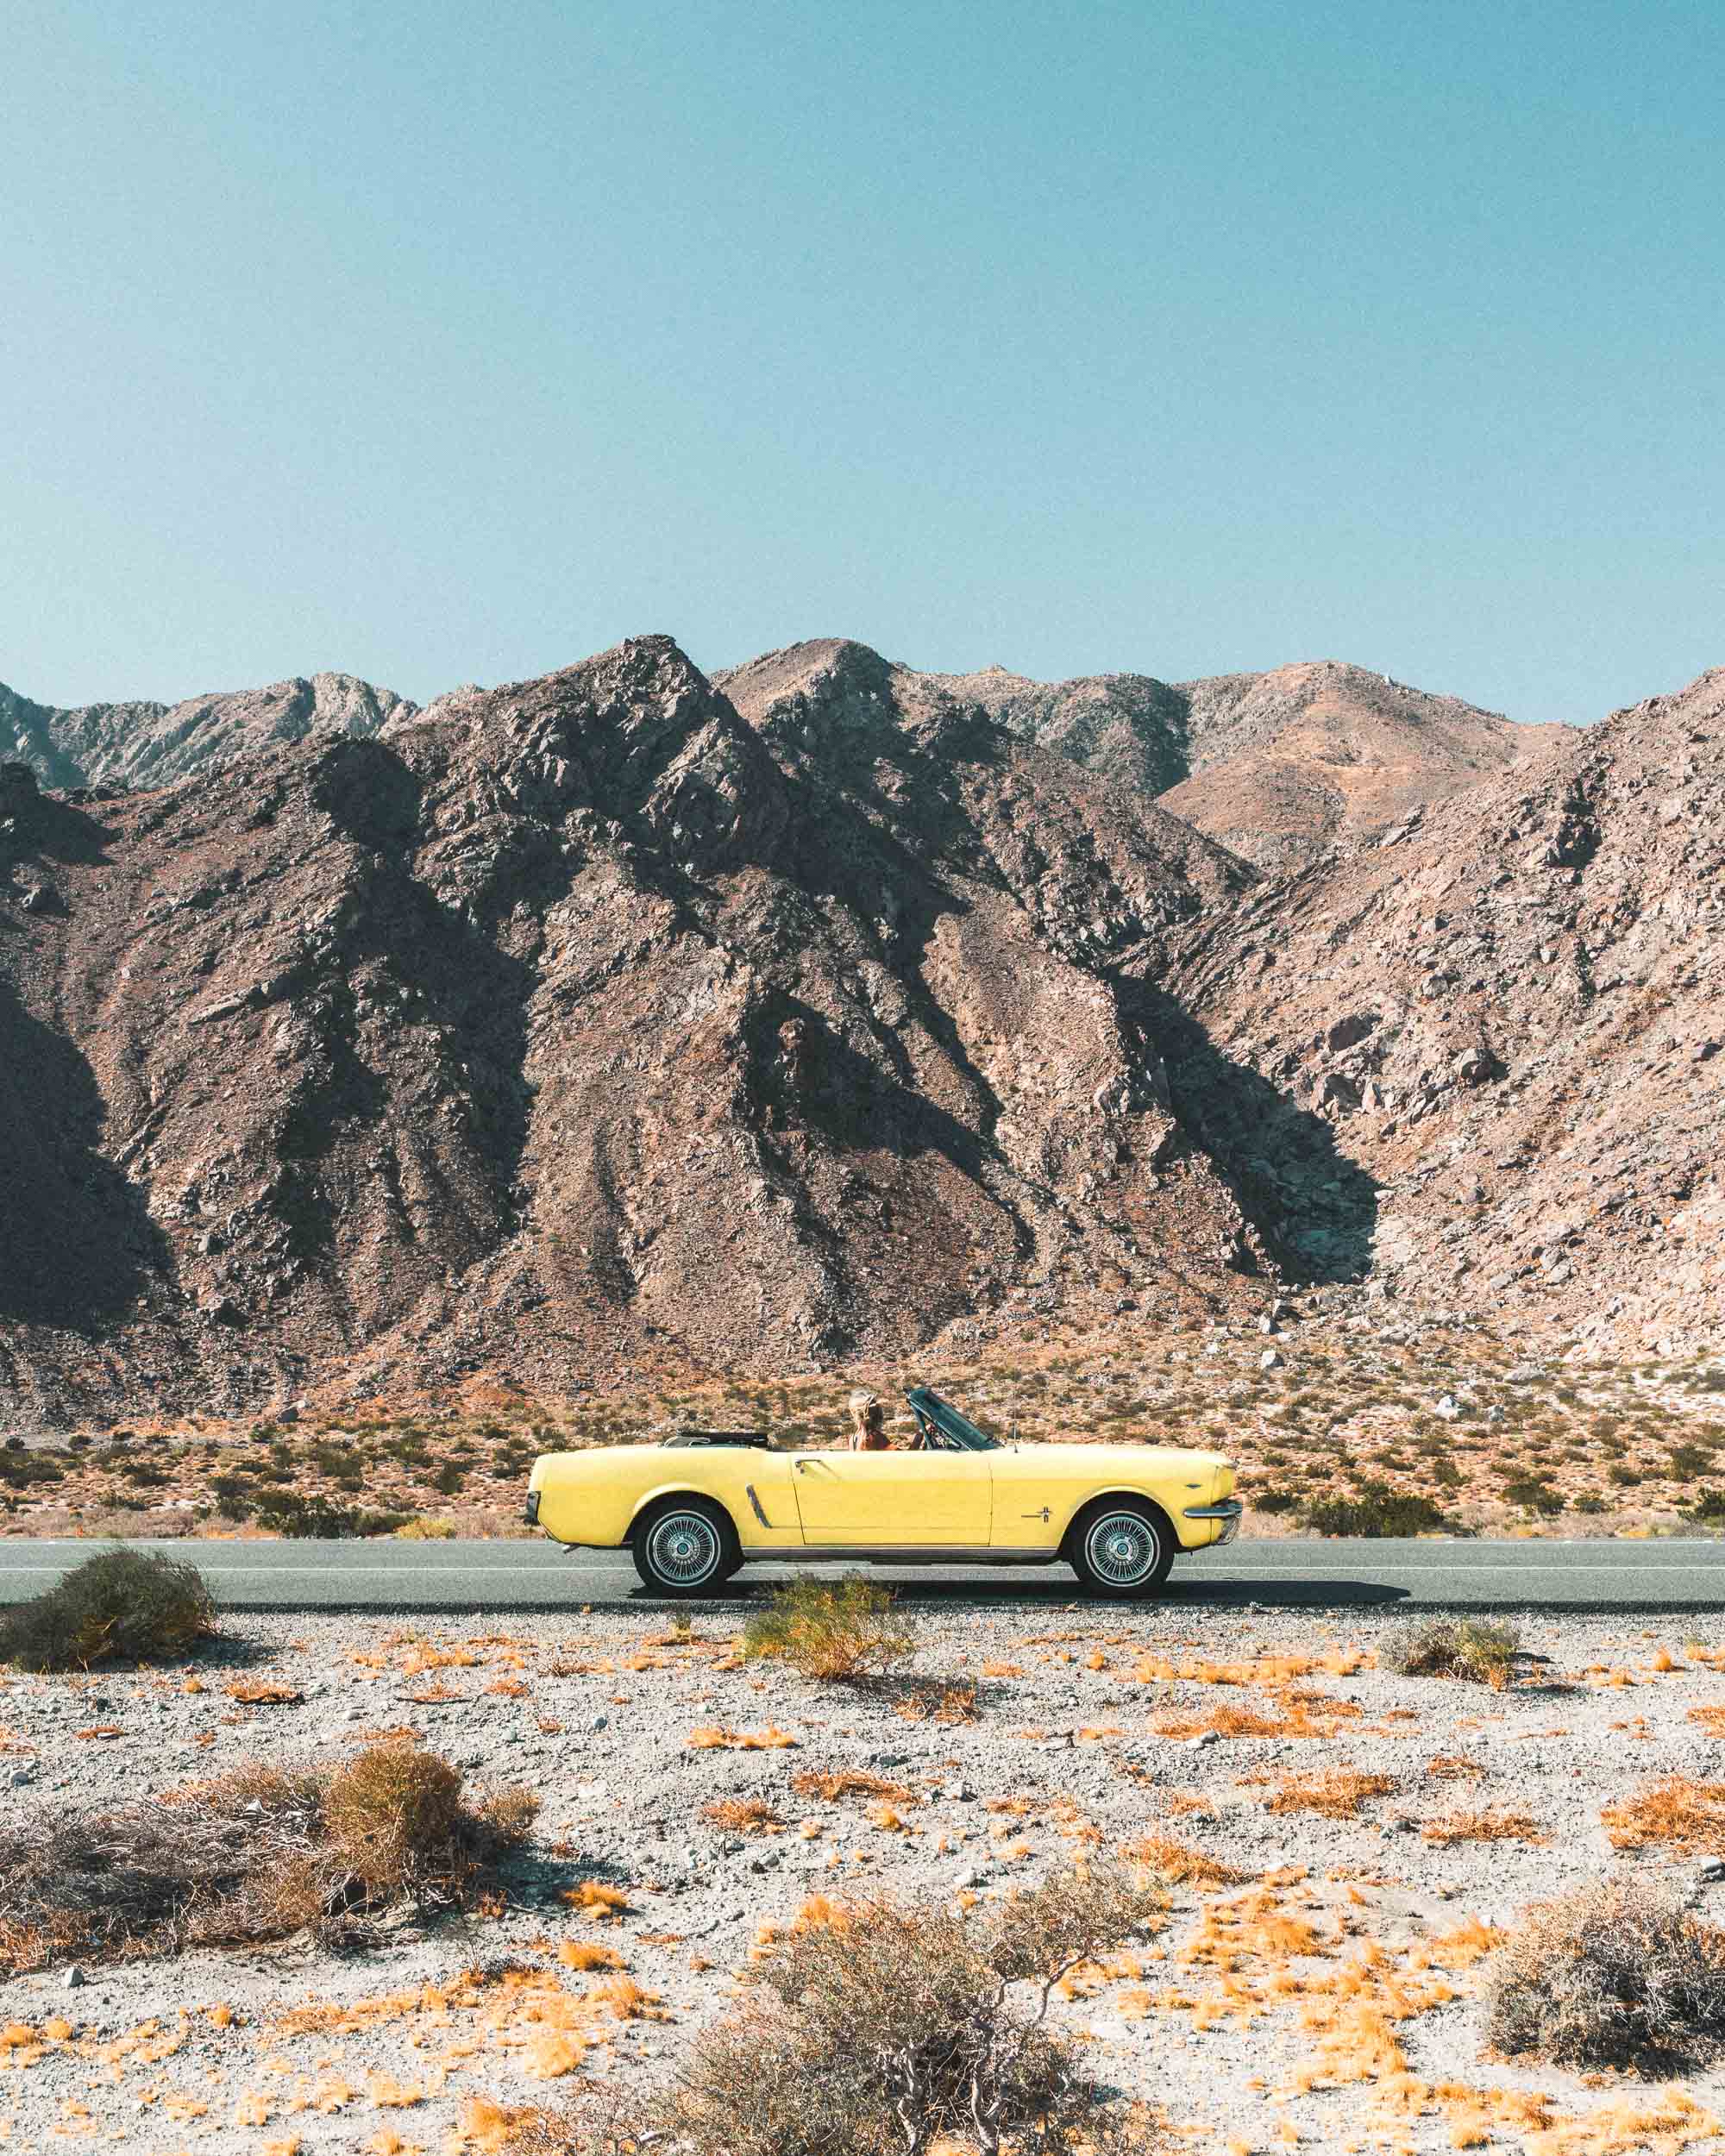
Shot on Sony a7RII + Sony 35mm lens in Palm Desert, California | f/16 | 1/125 sec | ISO 200 | Edited with our Lightroom Presets
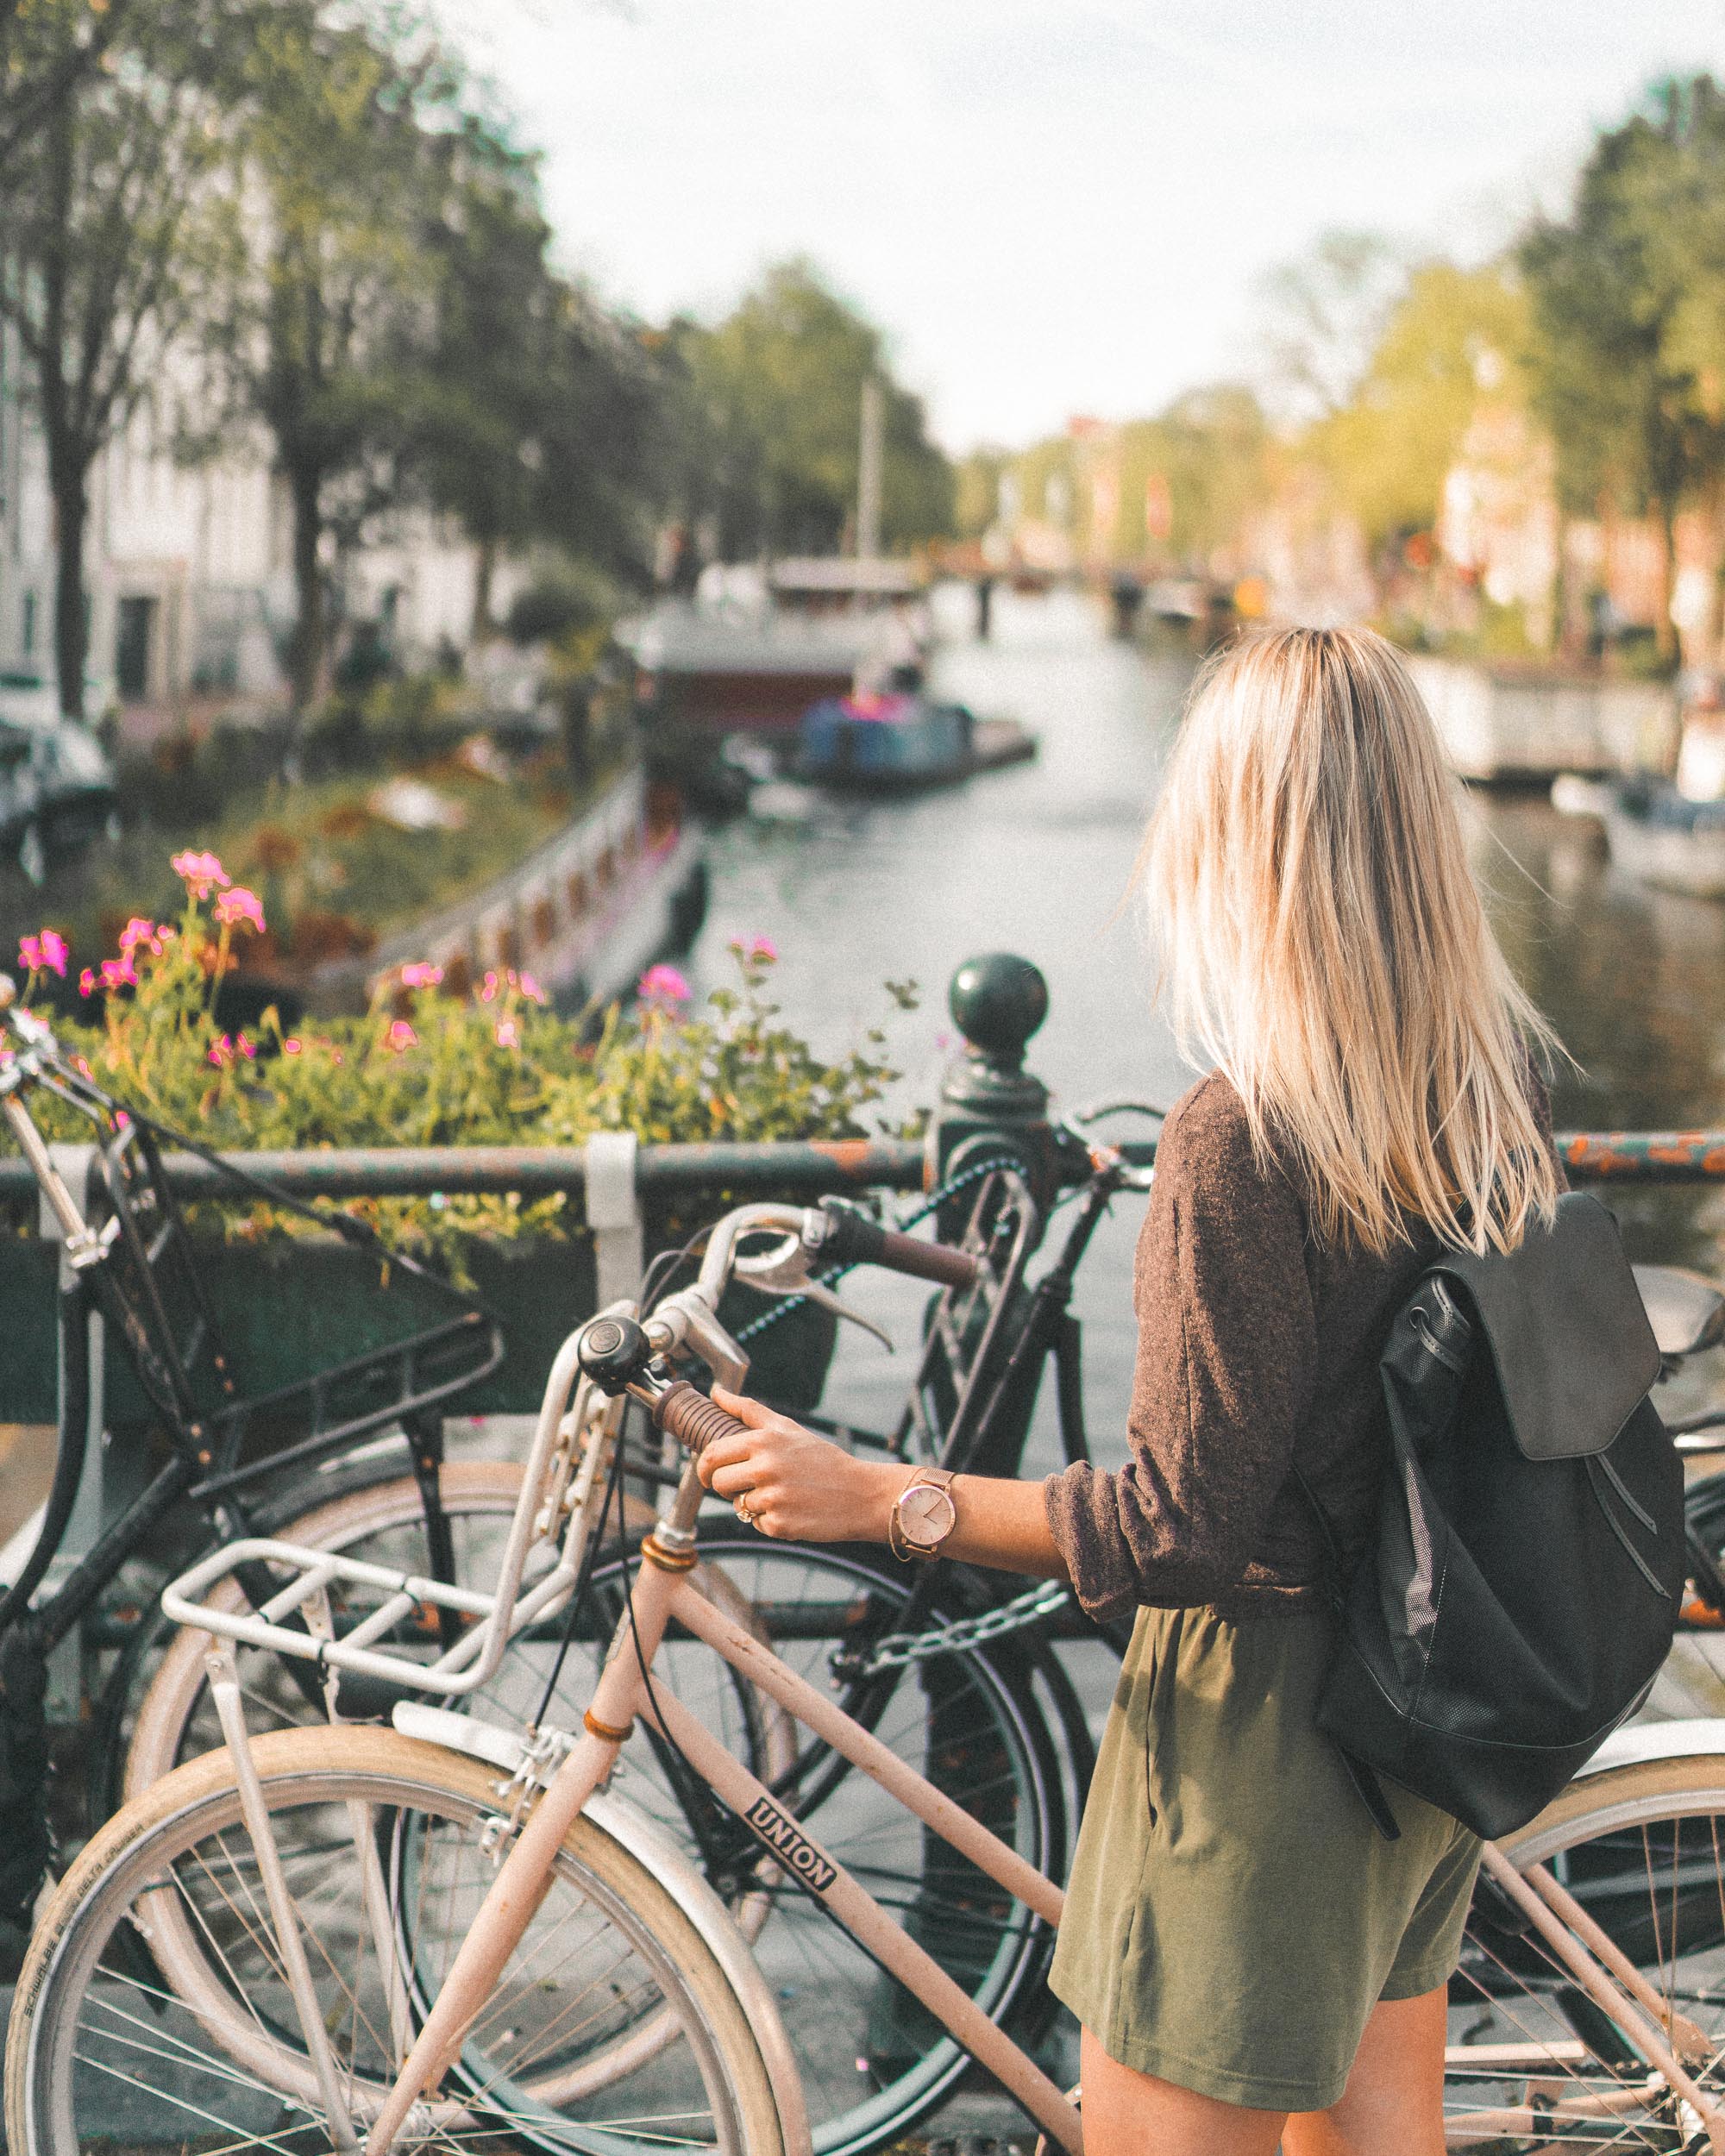
Shot on Sony a7RII + Sony 35mm lens in Amsterdam, Netherlands | f/1.4 | 1/4000 sec | ISO 200 | Edited with our Lightroom Presets
High contrast situations
If we’re shooting in a situation where there are bright skies and dark shadows, for example during sunset, then I’ll tend to underexpose the image. This means I’ll set my exposure for the brightest parts rather than the shadows. When you’re underexposing an image your camera’s light meter might show you -1,-2, or -3 instead of 0.
When you’re editing, it’s fairly easy to brighten the shadows and dark parts of your image but it will be more difficult to try and bring back parts of your image that are over-exposed. Keep in mind that brightening shadows from an image taken at a high ISO (400 ISO or more) will introduce more noise in your photo. If you know you’re going to want to lift the shadows then try and shoot at a low ISO (between 100-400 ISO).
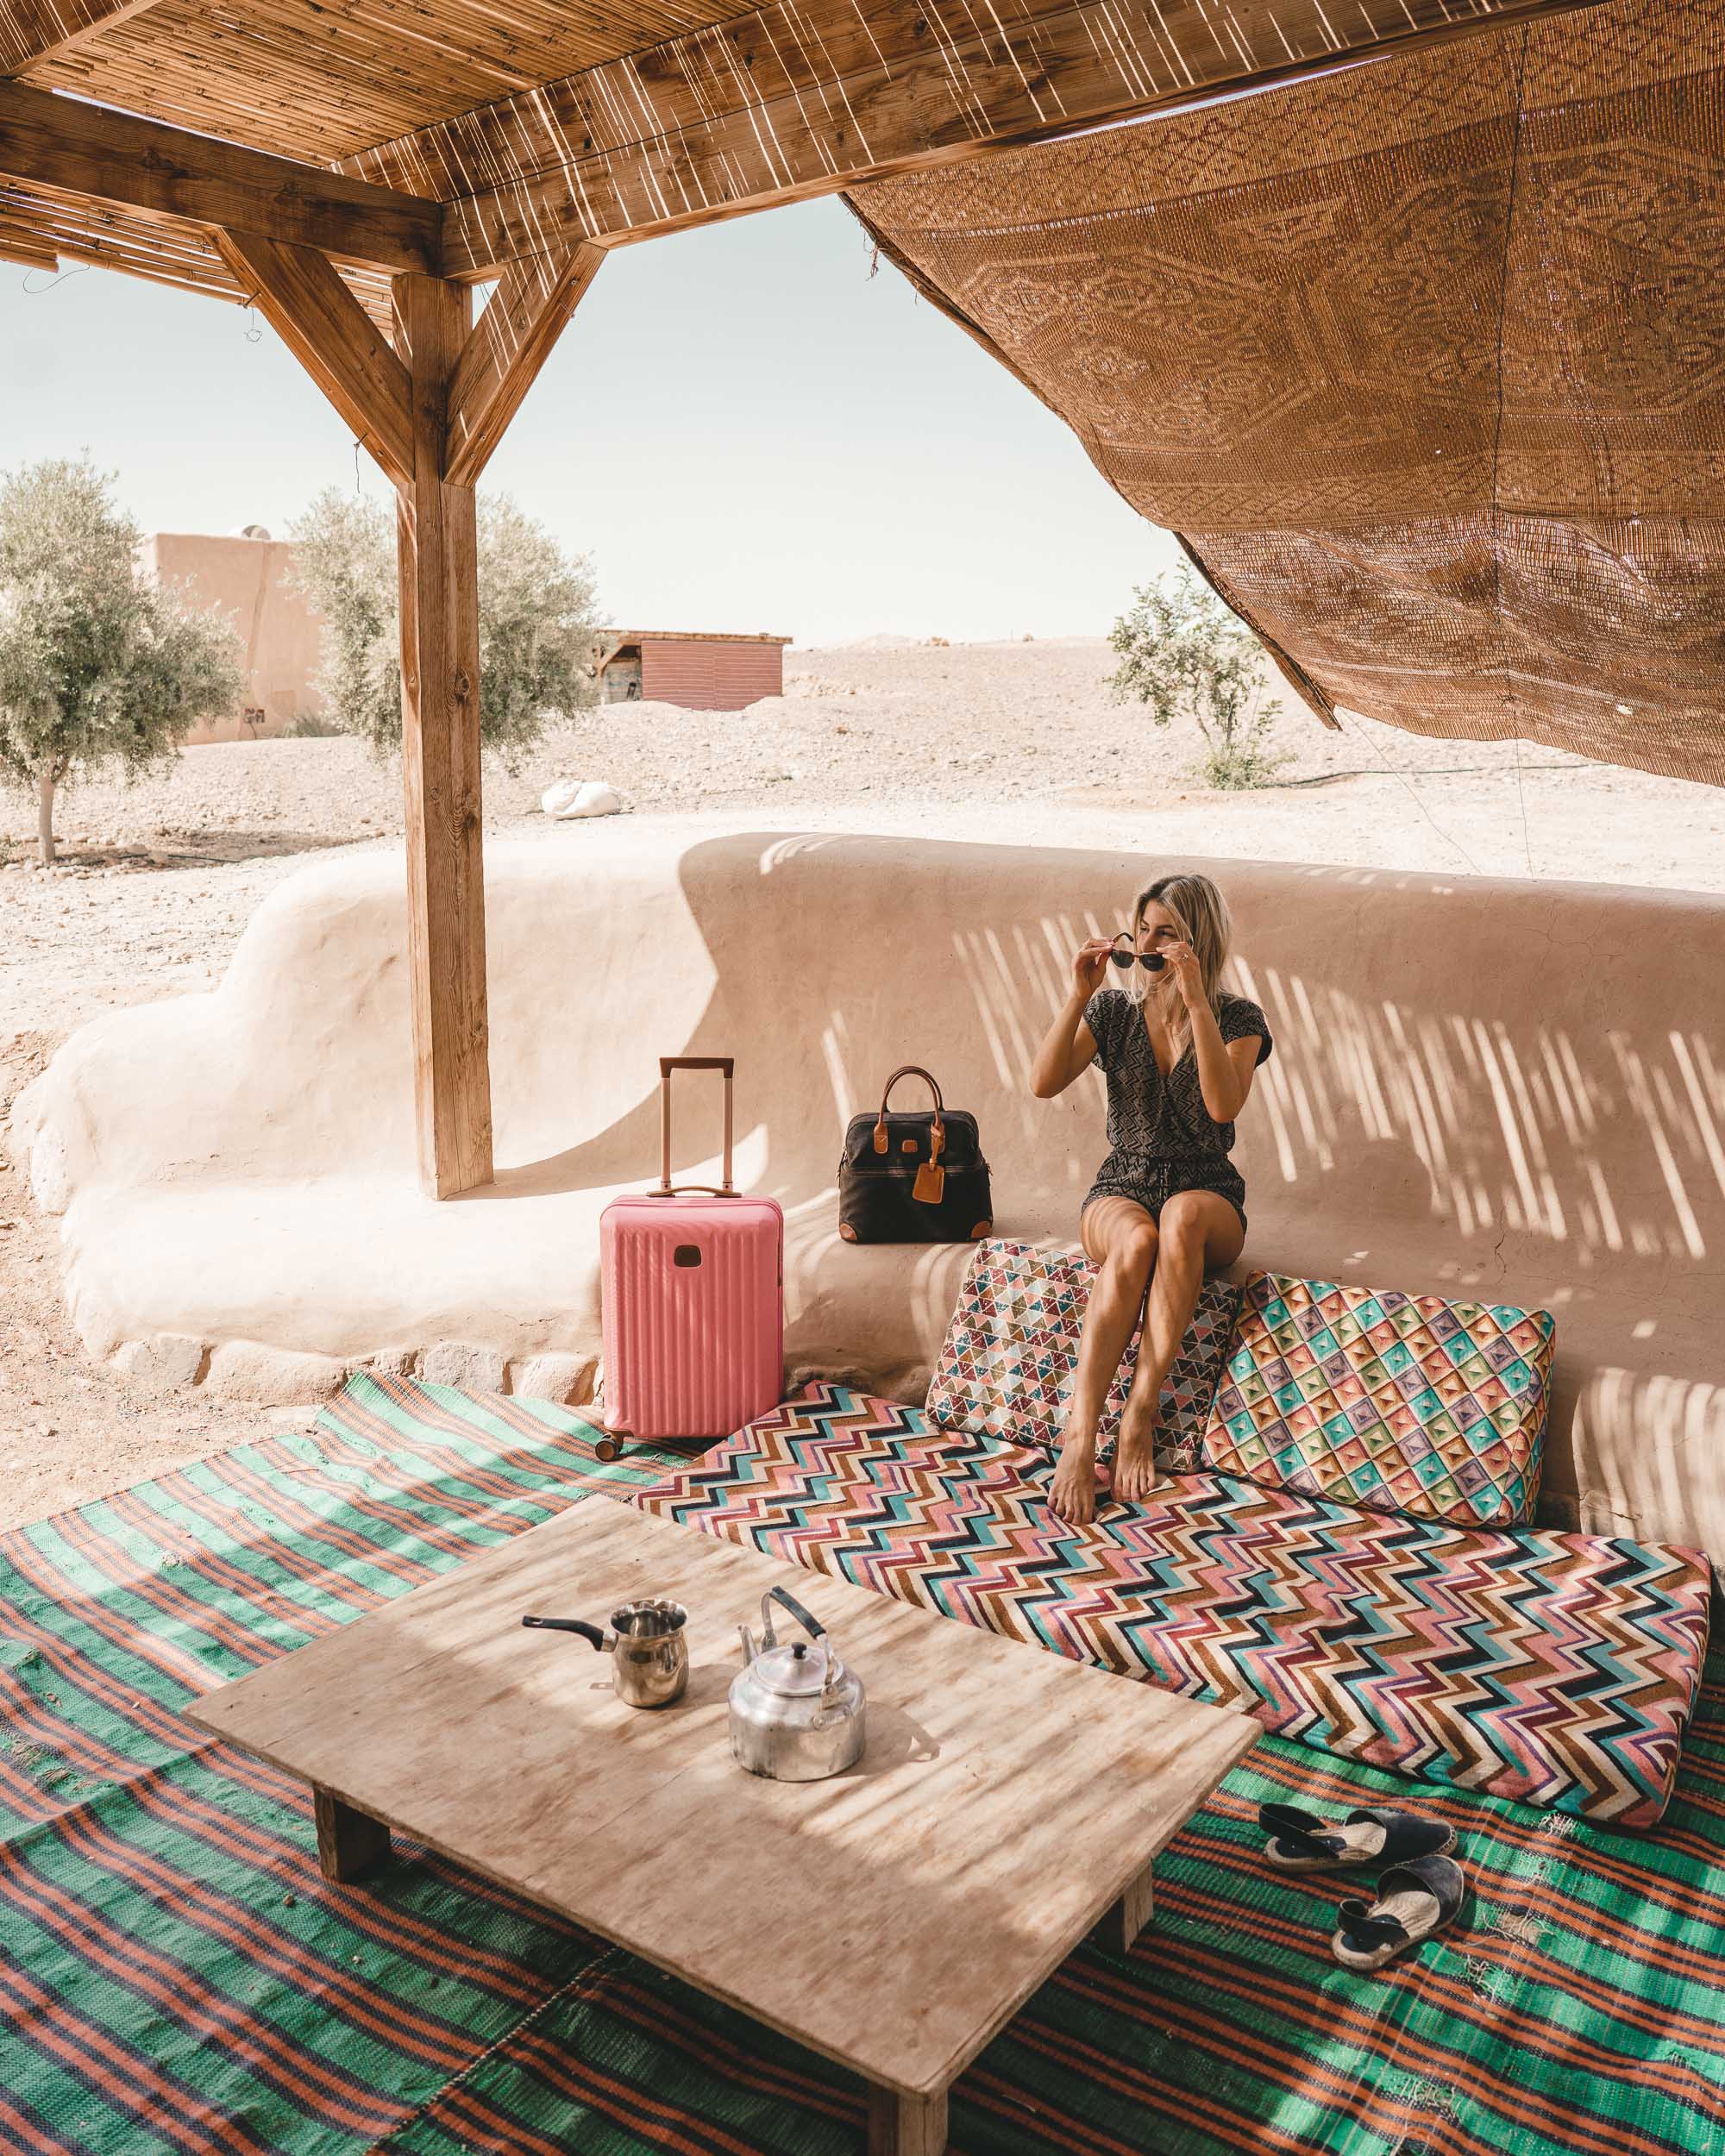
Shot on Sony a7RII + Sony 25mm lens at Desert Days Camp, Israel | f/4 | 1/1000 sec | ISO 200 | Edited with our Lightroom Presets
Shot on Sony a7RII + Sony 25mm lens in the Negev Desert, Israel | f/7.1 | 1/640 sec | ISO 400 | Edited with our Lightroom Presets
Nighttime shots
Shooting at night can be a challenge. The trick is to get as much light to the sensor as you can. This can be done by slowing the shutter speed, opening the aperture, and raising the ISO. It’s important to understand how each of these will impact your image so you can choose what is best for any given scenario.
Slowing the shutter speed will increase motion blur. Typically if you’re shooting a long exposure (anything that’s 1/60 second or slower) then you’ll want to have the camera on a tripod. Keep in mind that opening the aperture (i.e. setting it to a low number such as f/1.4-2.8) will let more light in, but it will also make the depth of field shallower, creating more bokeh. If you want to take a nighttime shot where everything is in focus then this isn’t the right option. Try slowing the shutter speed instead.
Raising the ISO is a simple way to brighten the image. However, as you raise the ISO remember that you will be adding more noise to the image. This is because the camera is digitally boosting the sensitivity of the sensor to make the image brighter. Every camera’s noise levels are different, so I suggest experimenting with what ISO level you feel has acceptable noise. Keep in mind that noise isn’t very noticeable on the tiny LCD of a camera, so you’ll want to review images on a computer to be able to accurately decide what is the maximum ISO level you’ll want to shoot at.
For example, if I’m shooting stars I’ll typically have the ISO around 1600 on my Sony, aperture around f/2.8, and shutter speed around 10-30 seconds. These are general settings but they always depend on how bright the sky is. In this example, my camera is on a tripod and I’m careful not to bump or touch it while the photo is being taken. I also like to set the camera to 2 second timer mode to start, so that I don’t add any shake into the image when I press the shutter release button. This is useful anytime you’re taking an exposure longer than 1/60 sec on a tripod.
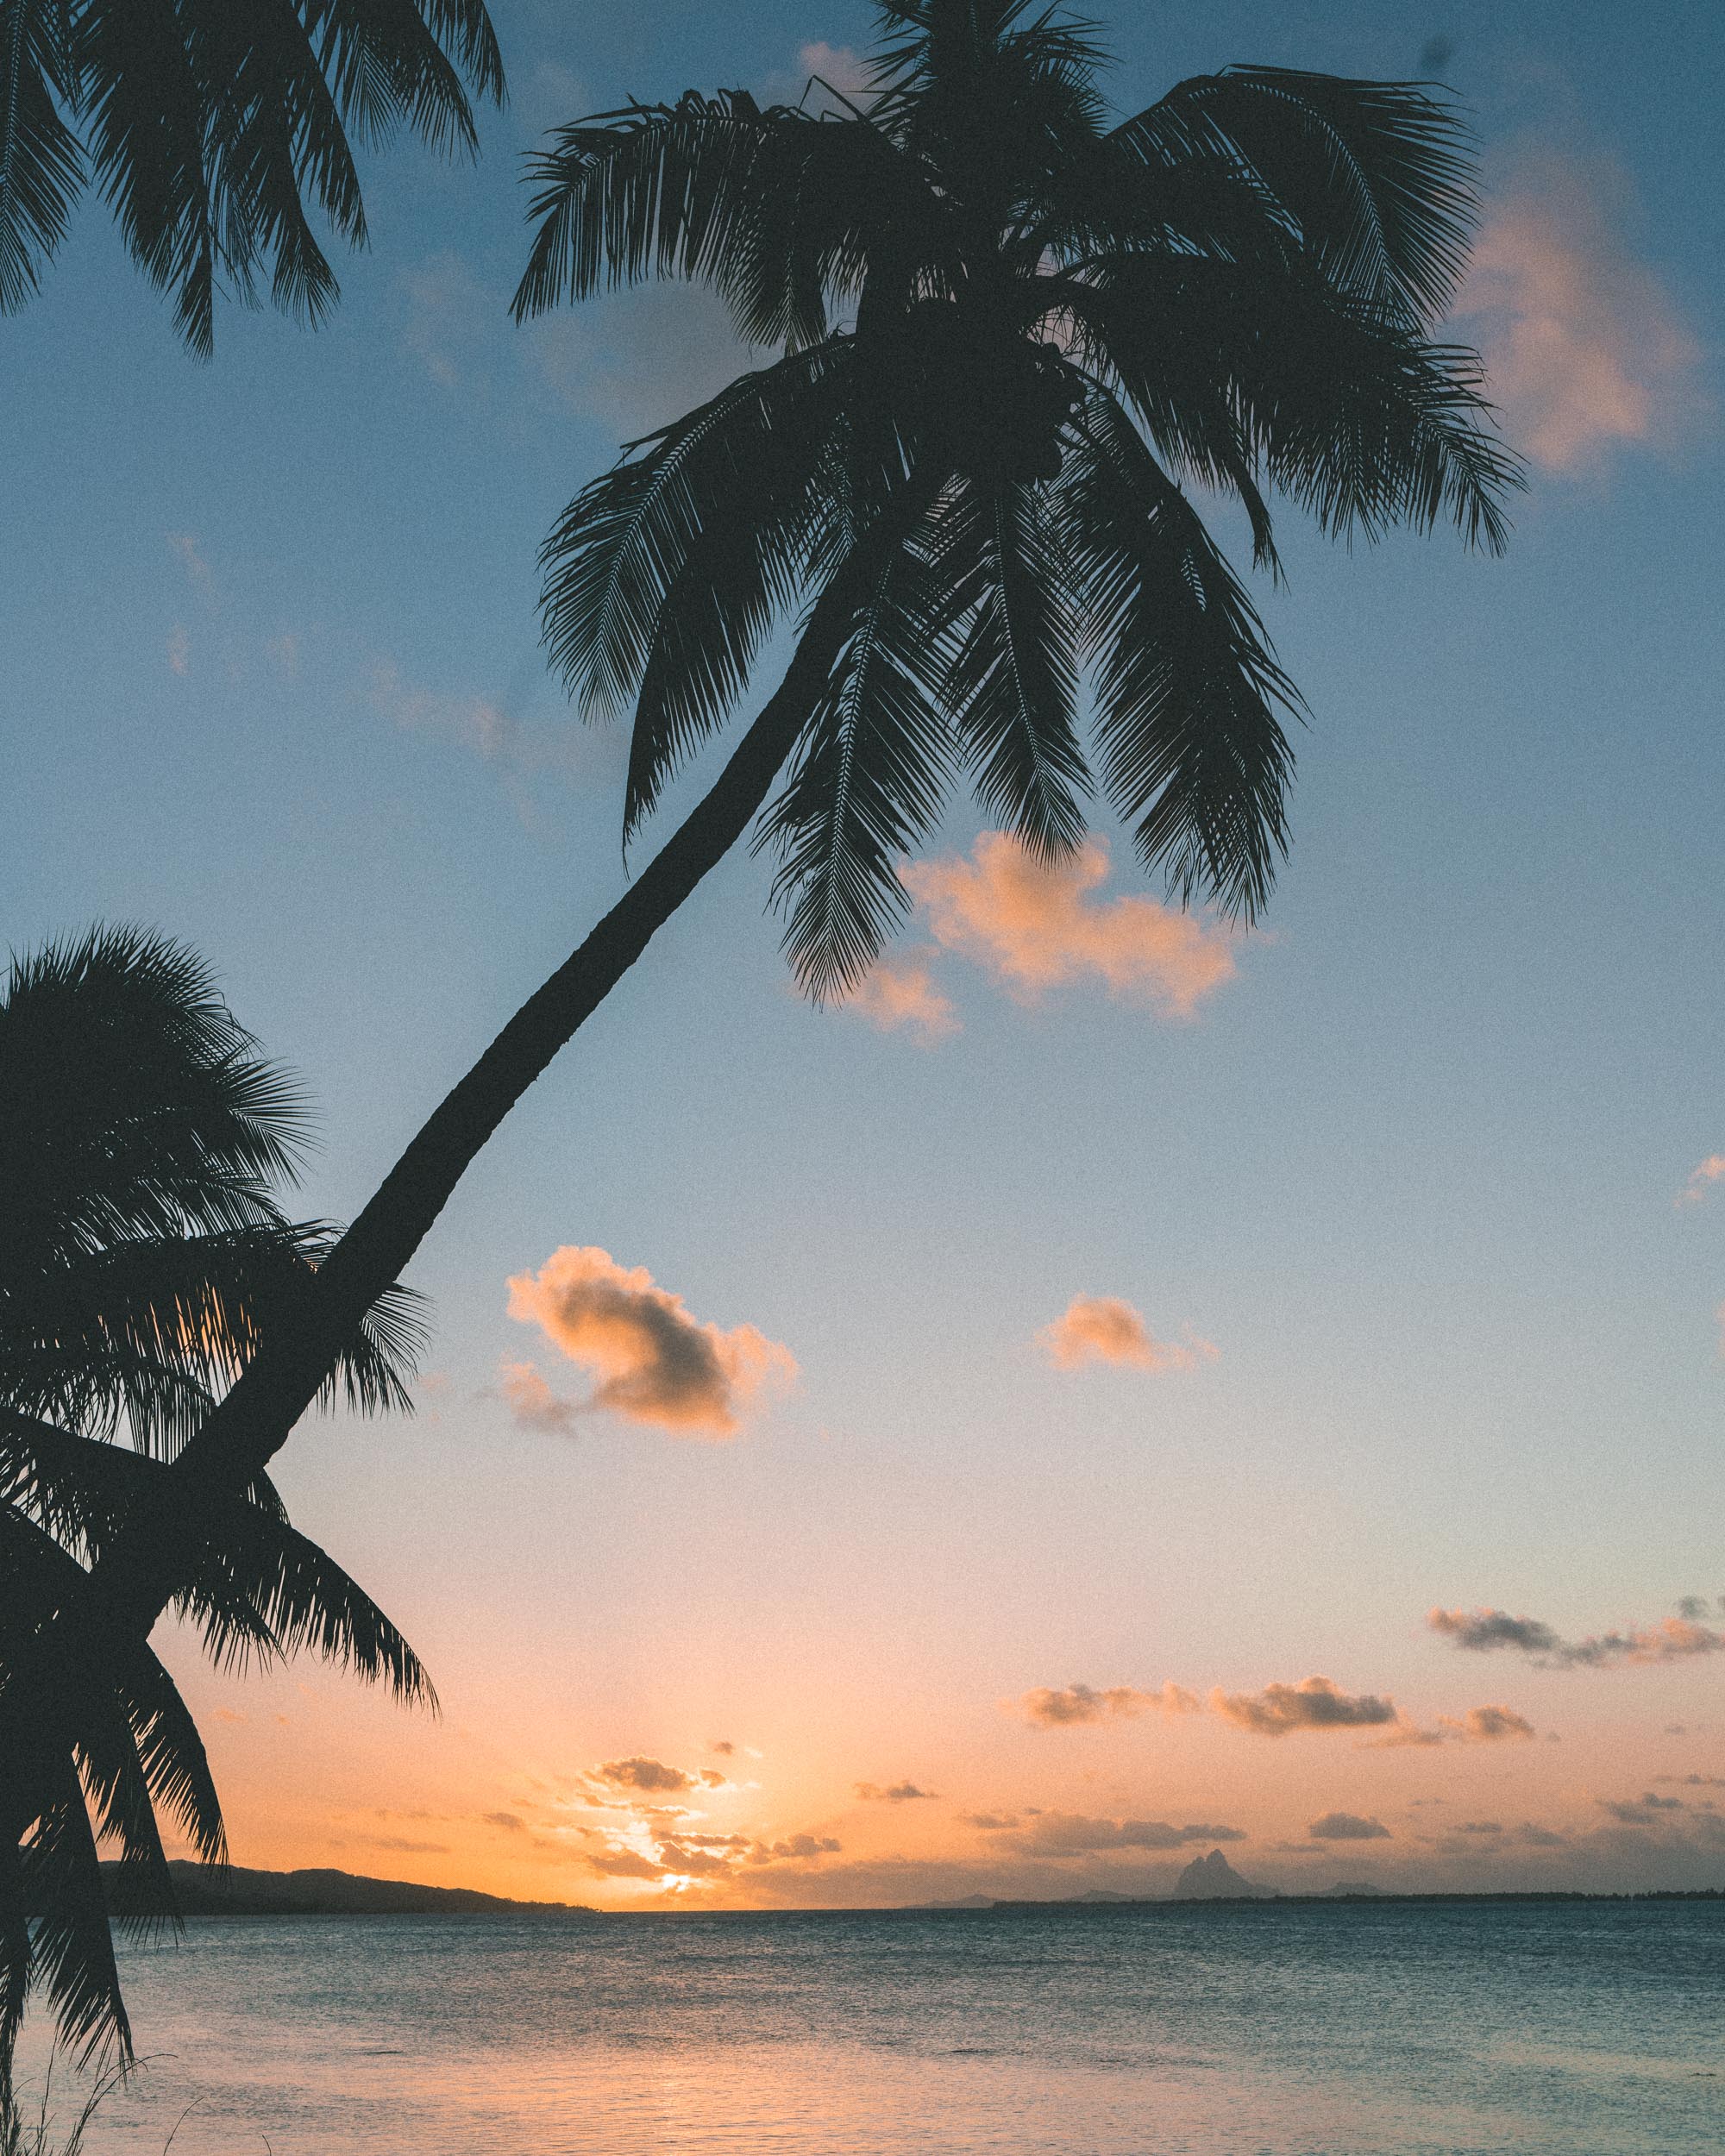
Shot on Sony a7RII + Sony 35mm lens at the Four Seasons Bora Bora, Tahiti | f/7.1 | 1/250 | ISO 400 | Edited with our Lightroom Presets
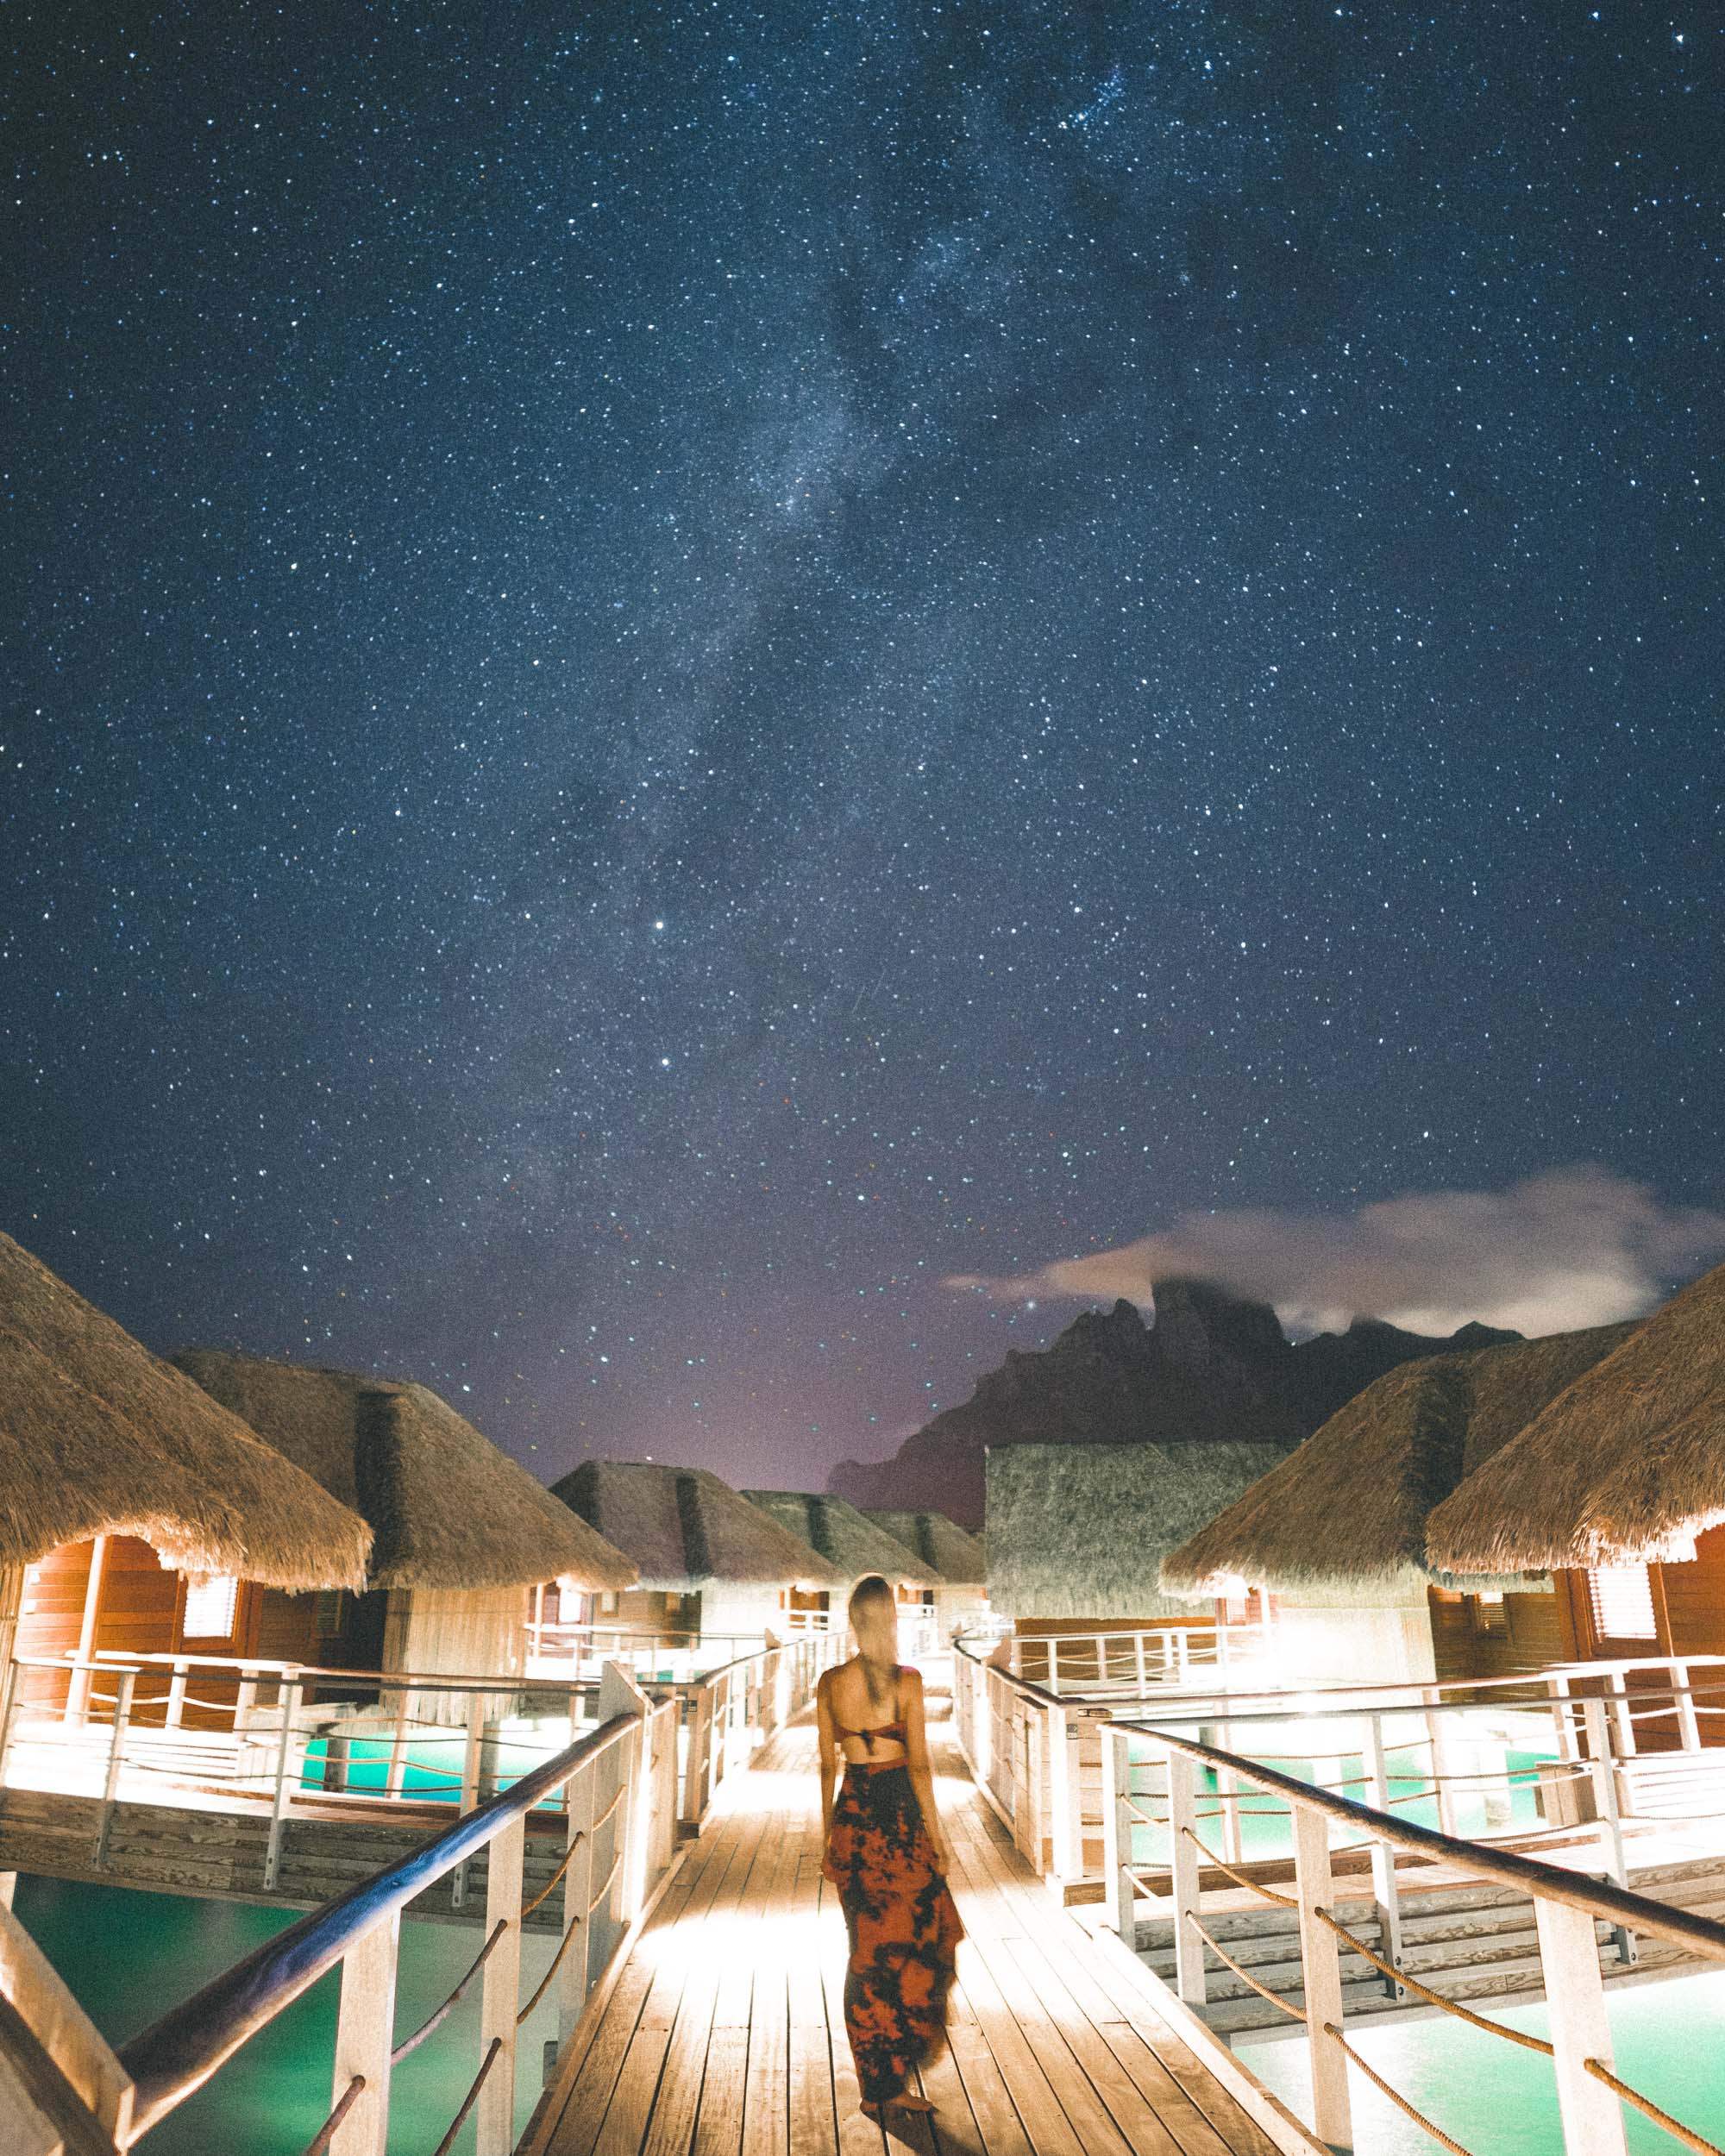
Shot on Sony a7RII + Sony 25mm lens with a MeFOTO tripod at the Four Seasons Bora Bora, Tahiti | f/2 | 10 sec long exposure | ISO 1600 | Edited with our Lightroom Presets
How We Edit (Selena)
All of our photos are edited in Adobe Lightroom, which is what most professional photographers use to edit. If you’ve ever used the VSCO app, you’ll find that the layout and tools within Lightroom are actually quite similar. However, Lightroom will give you much more editing control and it also allows you to edit out any unsightly elements in your shots.
In general, we try to choose photos for blog posts or Instagram that need minimal editing. If a shot is out of focus or doesn’t stand out, we won’t bother with it. I always prefer quality over quantity!
1. Apply a preset
I always start by first applying my own presets. You can purchase the exact same presets I use to edit in our preset shop. When I’m editing a photo from a new destination and I like the way it looks, I’ll always right click on the photo and ‘Add’ it to my presets folder for later use. Usually I gravitate towards edits that:
- Have lifted blacks (found in Lightroom’s ‘tone curves’)
- Muted colors (controlled with Lightroom’s ‘saturation’ panel)
- Are bright (adjusted with ‘exposure’ and ‘contrast’ in Lightroom)
2. Adjust the basics
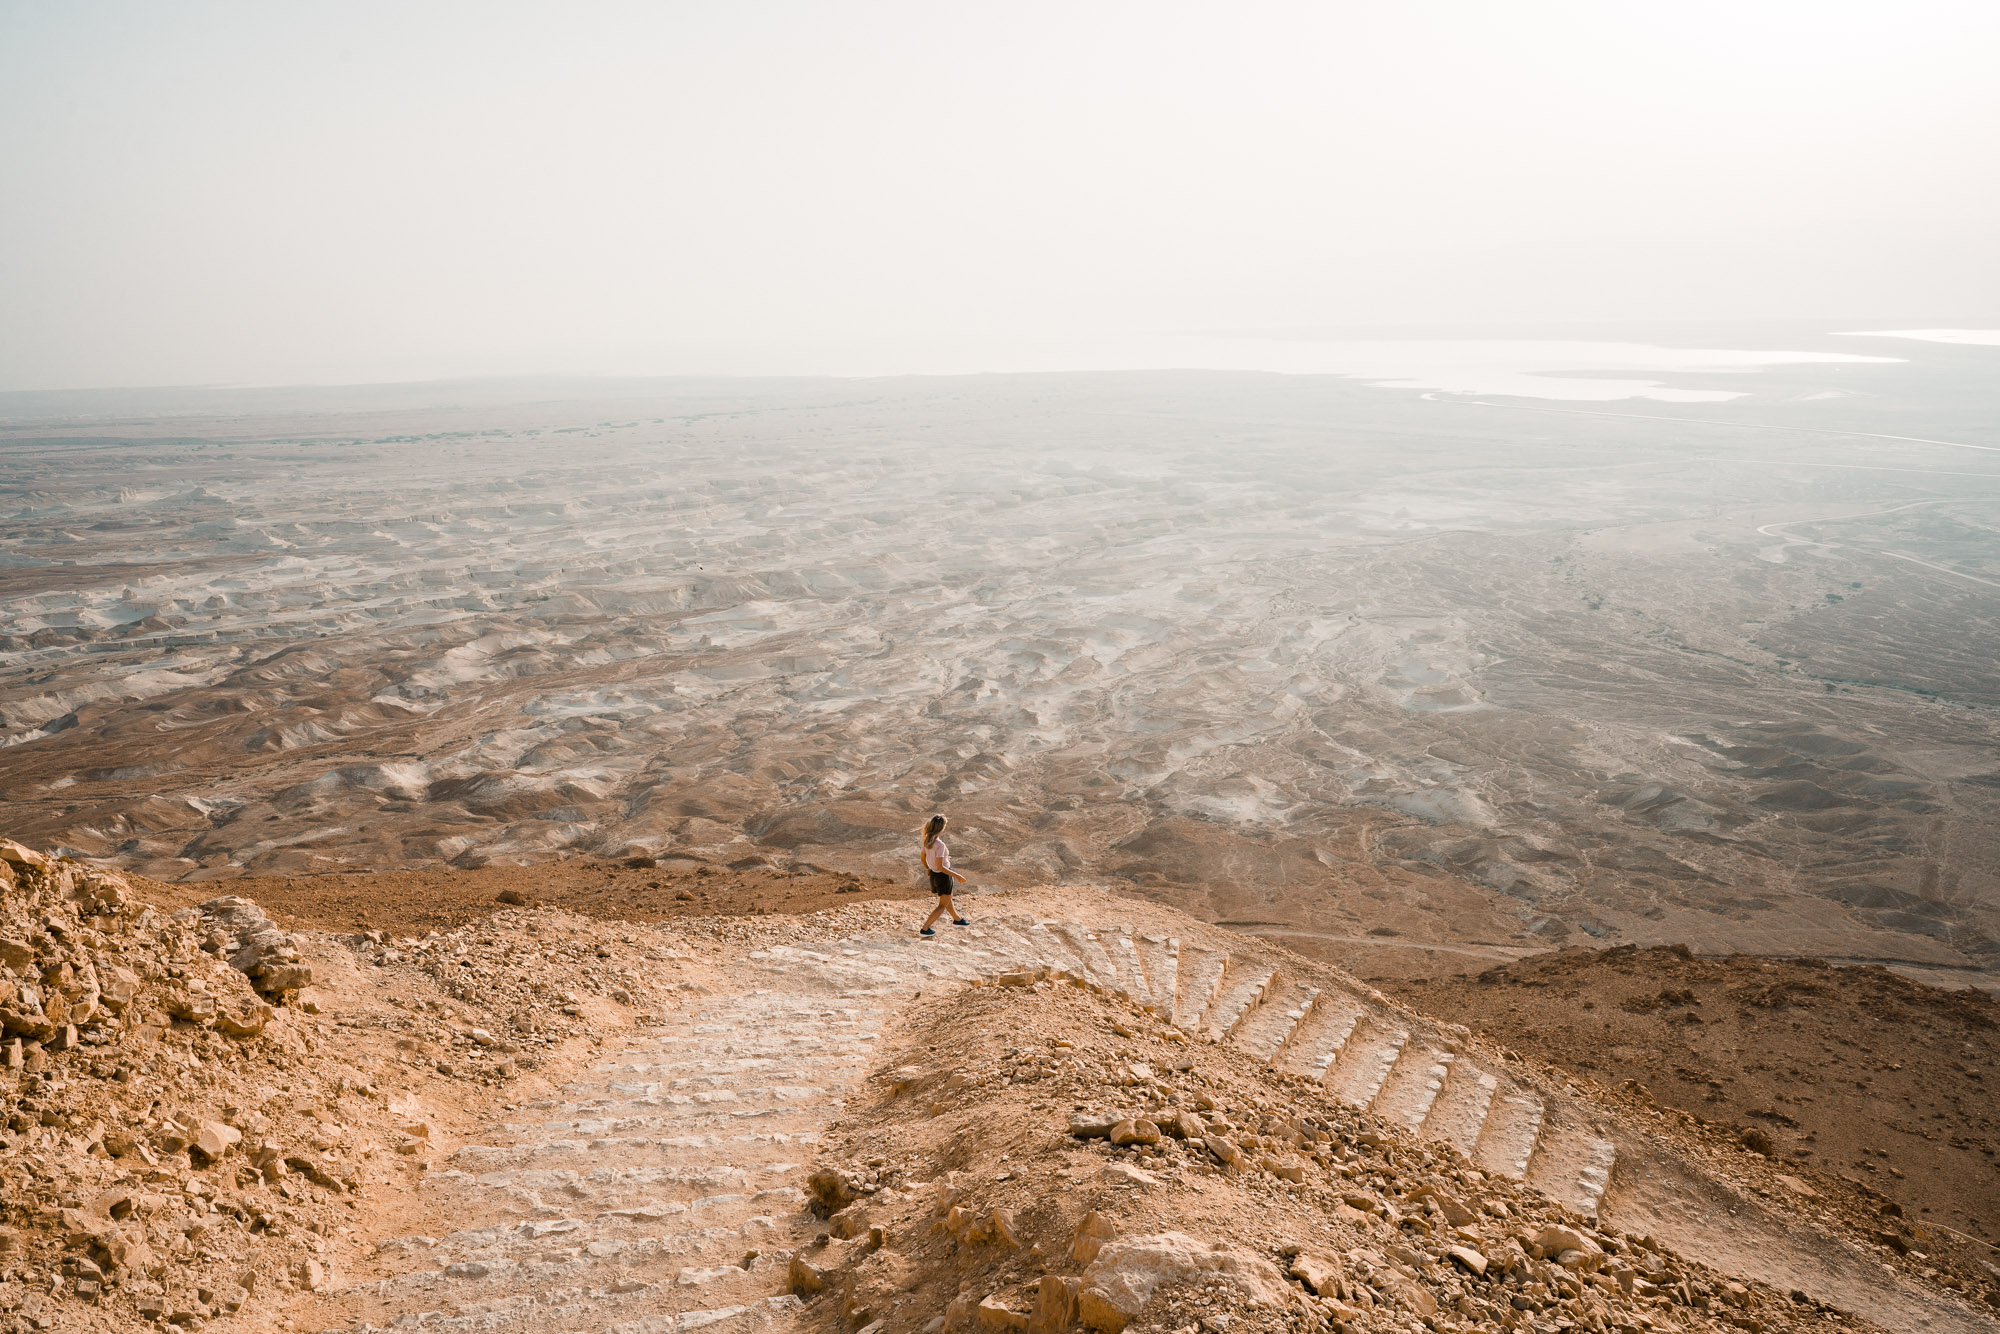
After applying my preset, I start with the basics. Usually this means increasing the exposure, contrast, and boosting the shadows. For photos where the subject is closer to the camera, I’ll usually lift the blacks more, like the photo below from Masada in Israel. For landscapes, I’ll typically increase contrast. And if the photo is shot at sunrise or sunset, I’ll usually exaggerate colors including the ‘split toning’ of an image, like the photo below taken at the Dead Sea.
3. Tweak colors
Blue and orange are complimentary colors and always look nice in photos. If the photo I’m editing has these colors I will try to bring them out by playing around with the color panel. I’ll also adjust the hue of blues to be more turquoise, and usually decrease the luminance and saturation with oranges since that will also affect my skin tone (and make me look tanner, like the Tahiti photo below!). For other colors, I’ll decrease saturation as needed. I probably spend the most time adjusting colors in an image.
4. Crop for the right medium
Once I’m pretty happy with my photo, I’ll crop it based on where I plan to use it. For Instagram, that usually means square or 4:5 ratio. For my blog, I’ll leave horizontal images as is or I’ll crop vertical images to a 4:5 ratio too, so that I can use them for Instagram and maintain consistency. I always pay attention to composition closely and crop specifically for the medium I plan to use the photo on.
5. Final tweaks
Lastly, I’ll remove anything in the photo that is distracting. That usually means signs, trash, even people in the background! Lightroom has a decent tool for this called the ‘spot removal’ tool. If heavy edits are needed however, I’ll right click on the photo and open it in Photoshop to make final adjustments.
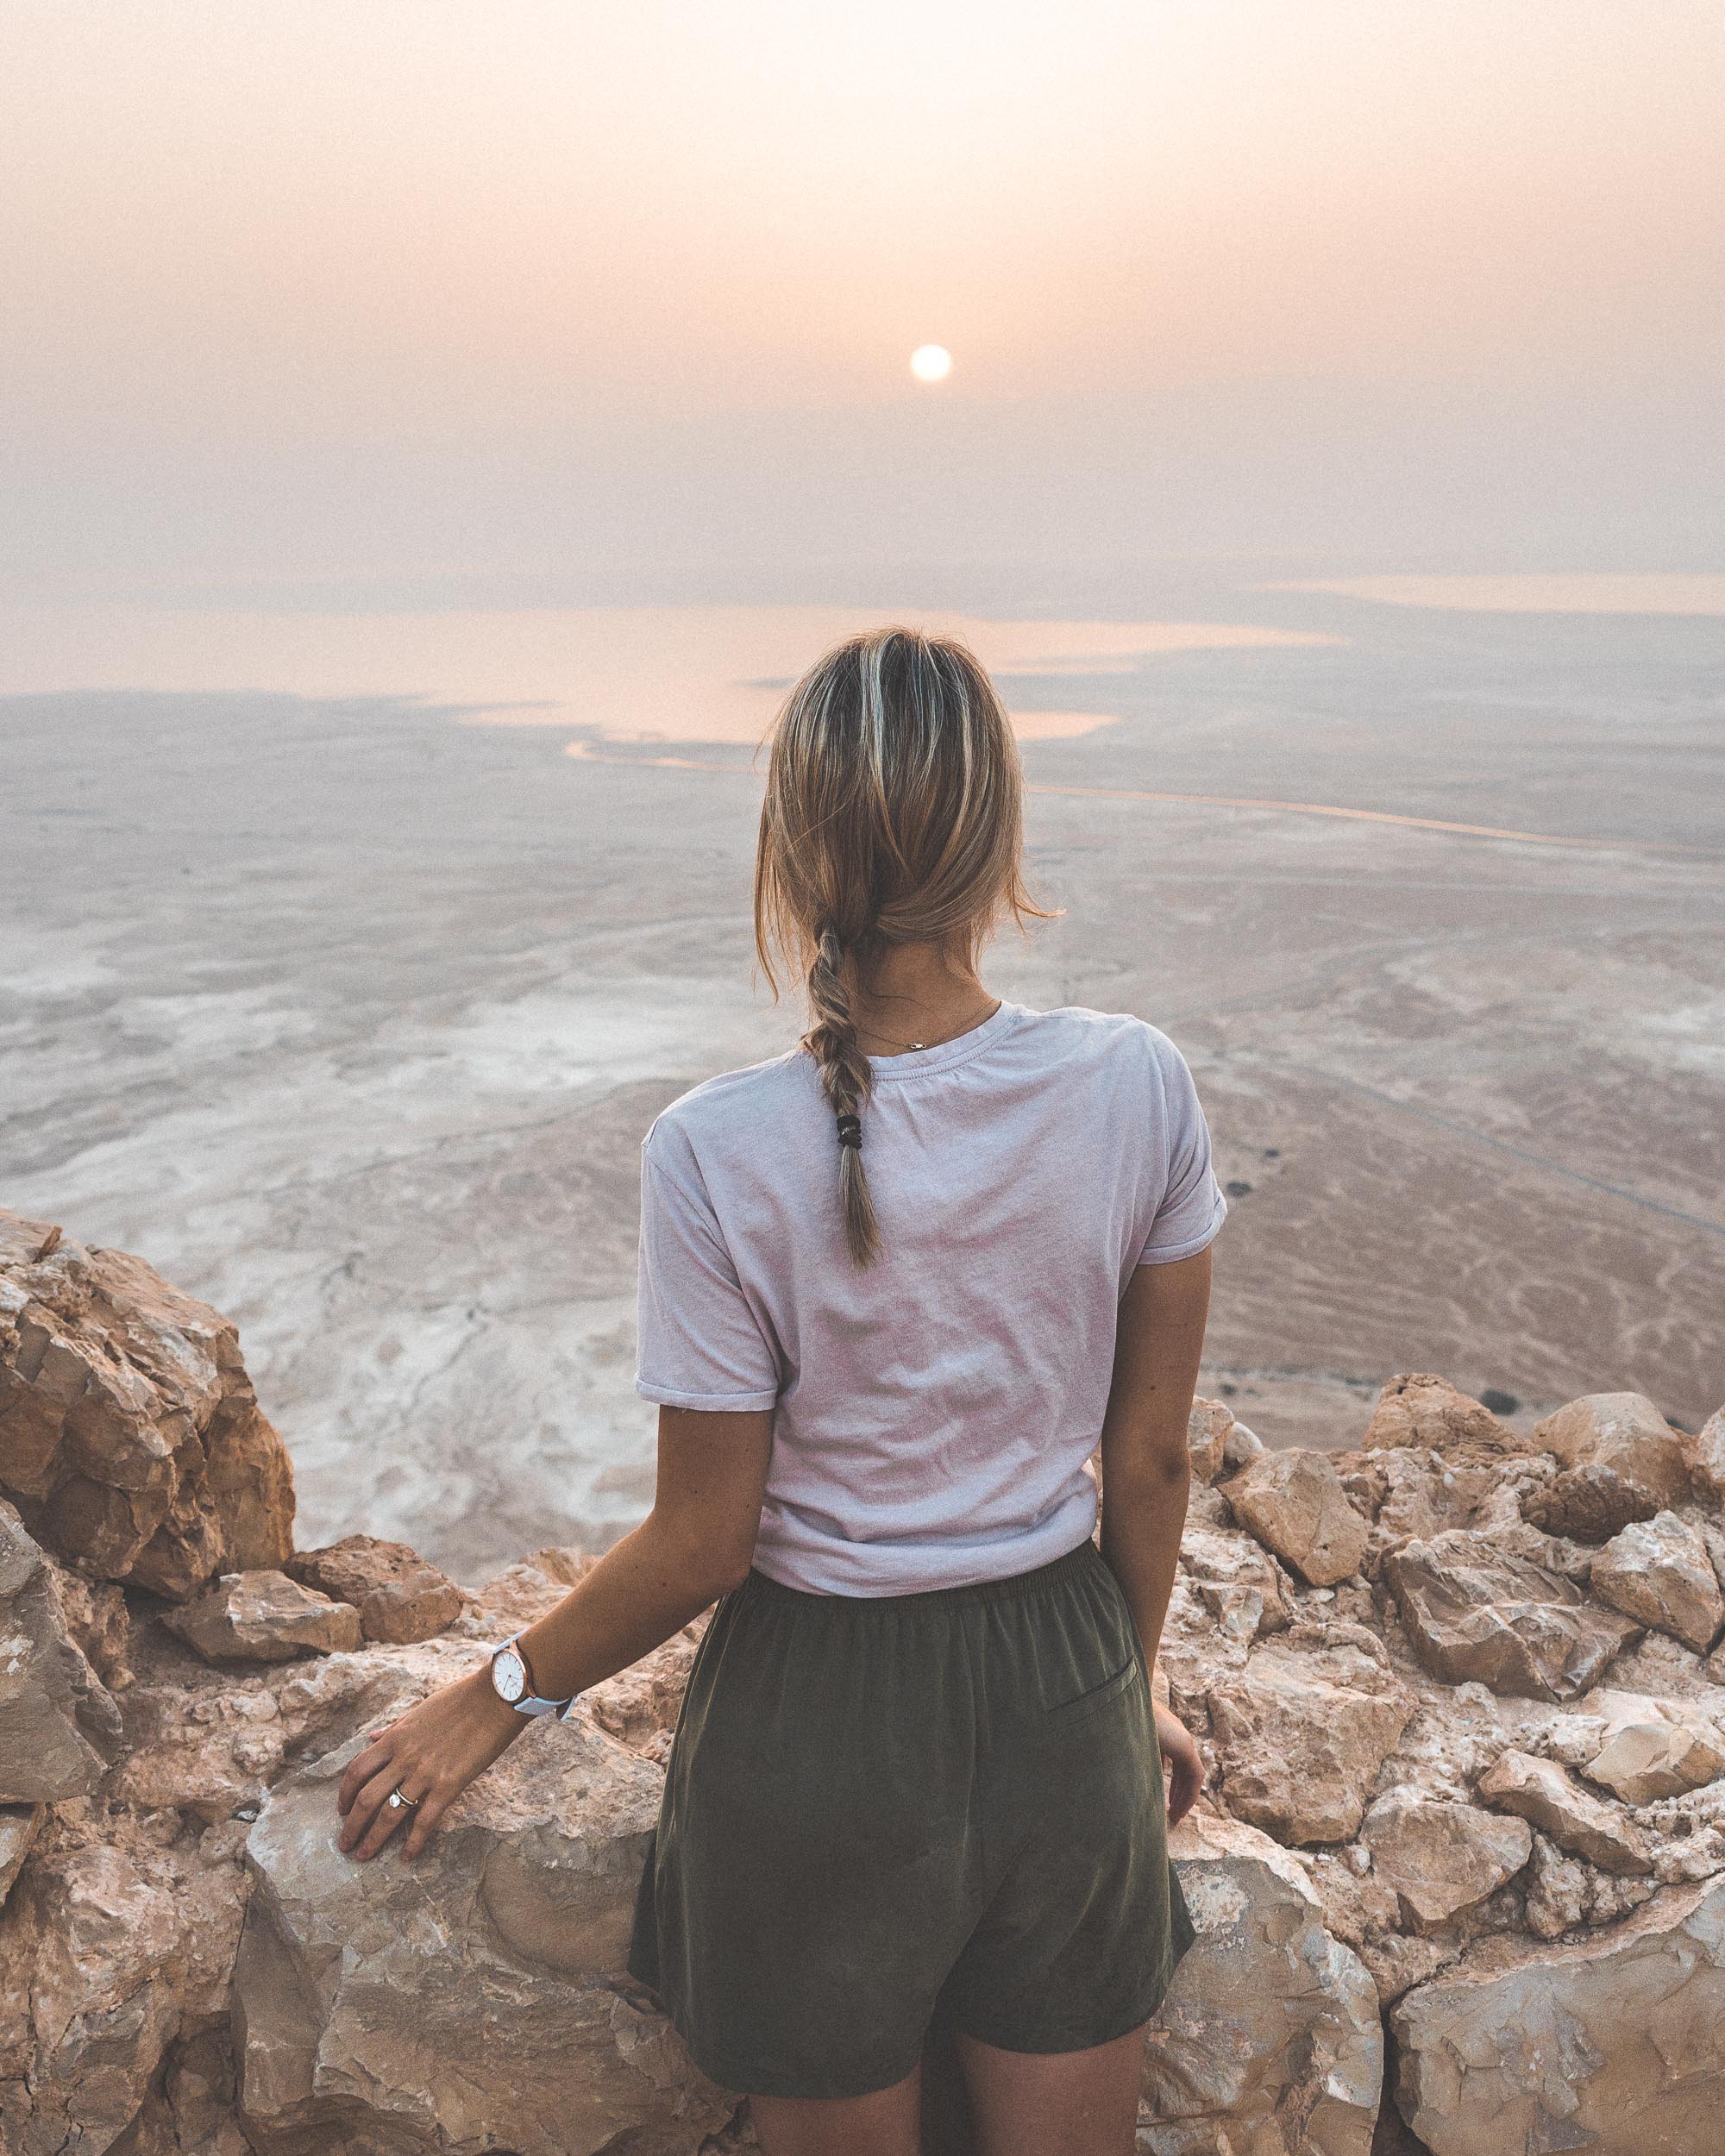
Shot on Sony a7RII + Sony 25mm lens in Masada, Israel | f/5.6 | 1/250 | ISO 200 | Edited with our Lightroom Presets
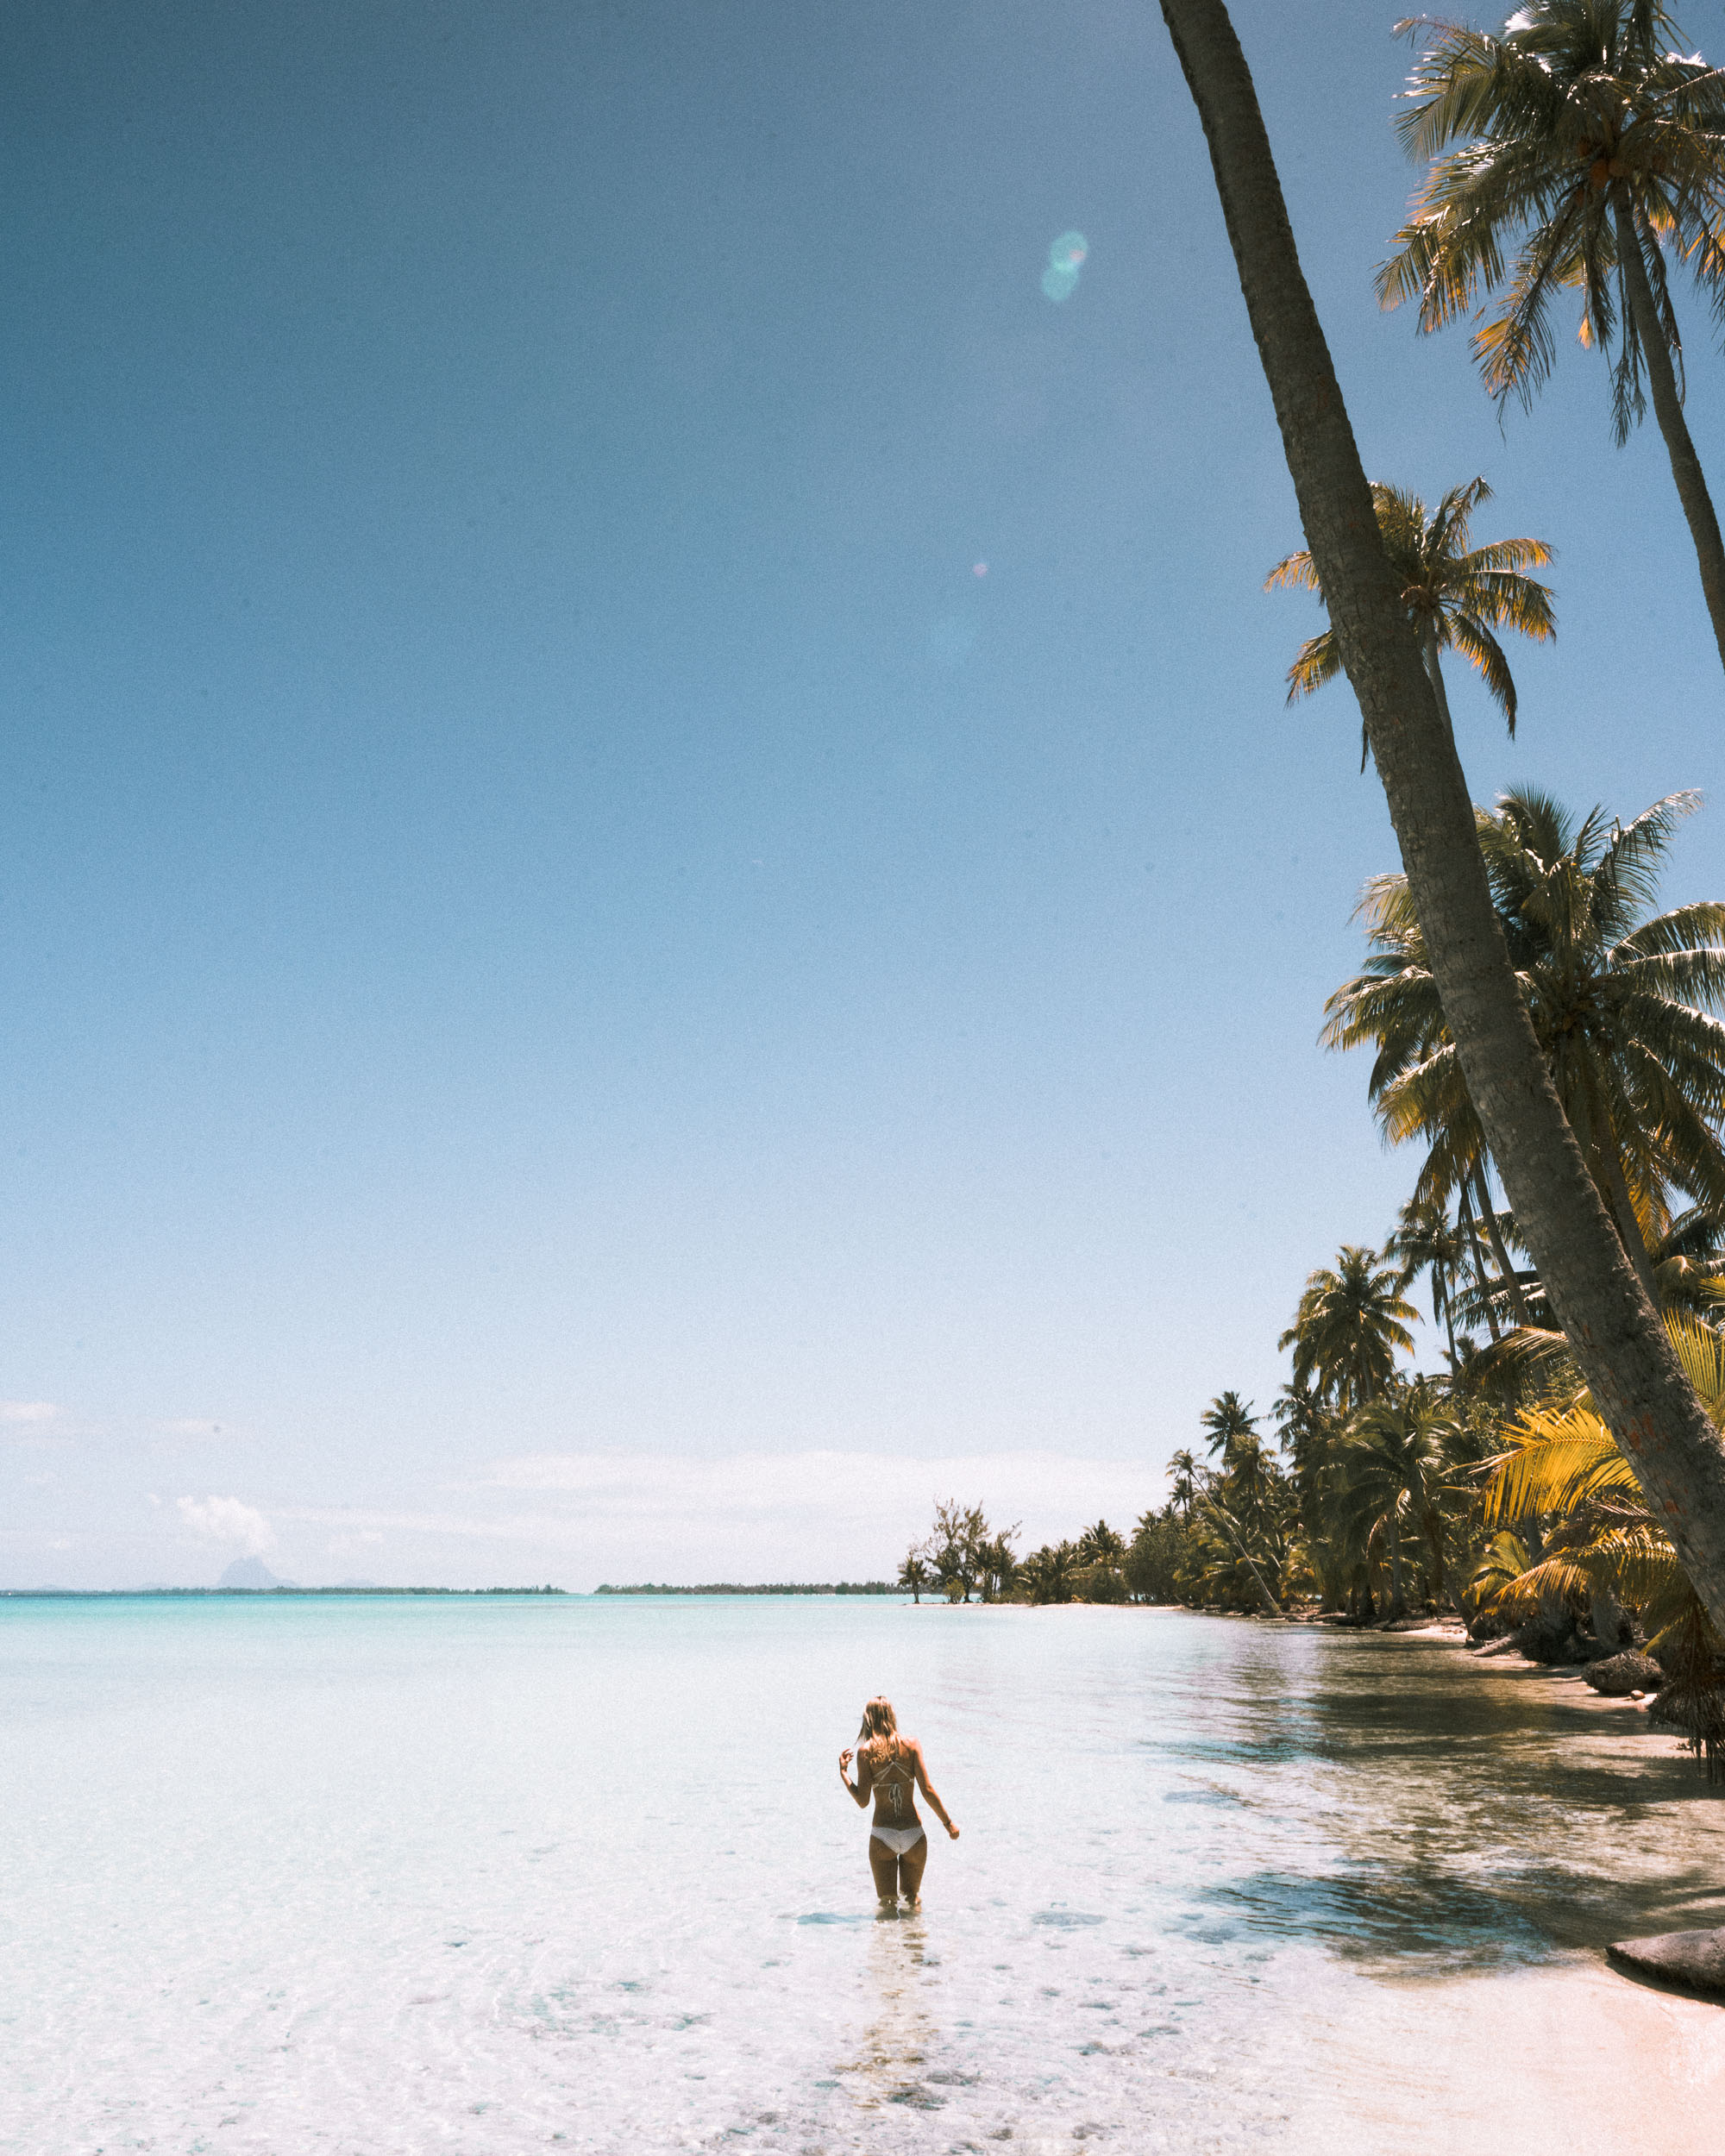
Shot on Sony a7RII + Sony 25mm lens at Vahine Island Resort, Tahiti | f/22 | 1/200 | ISO 640 | Edited with our Lightroom Presets
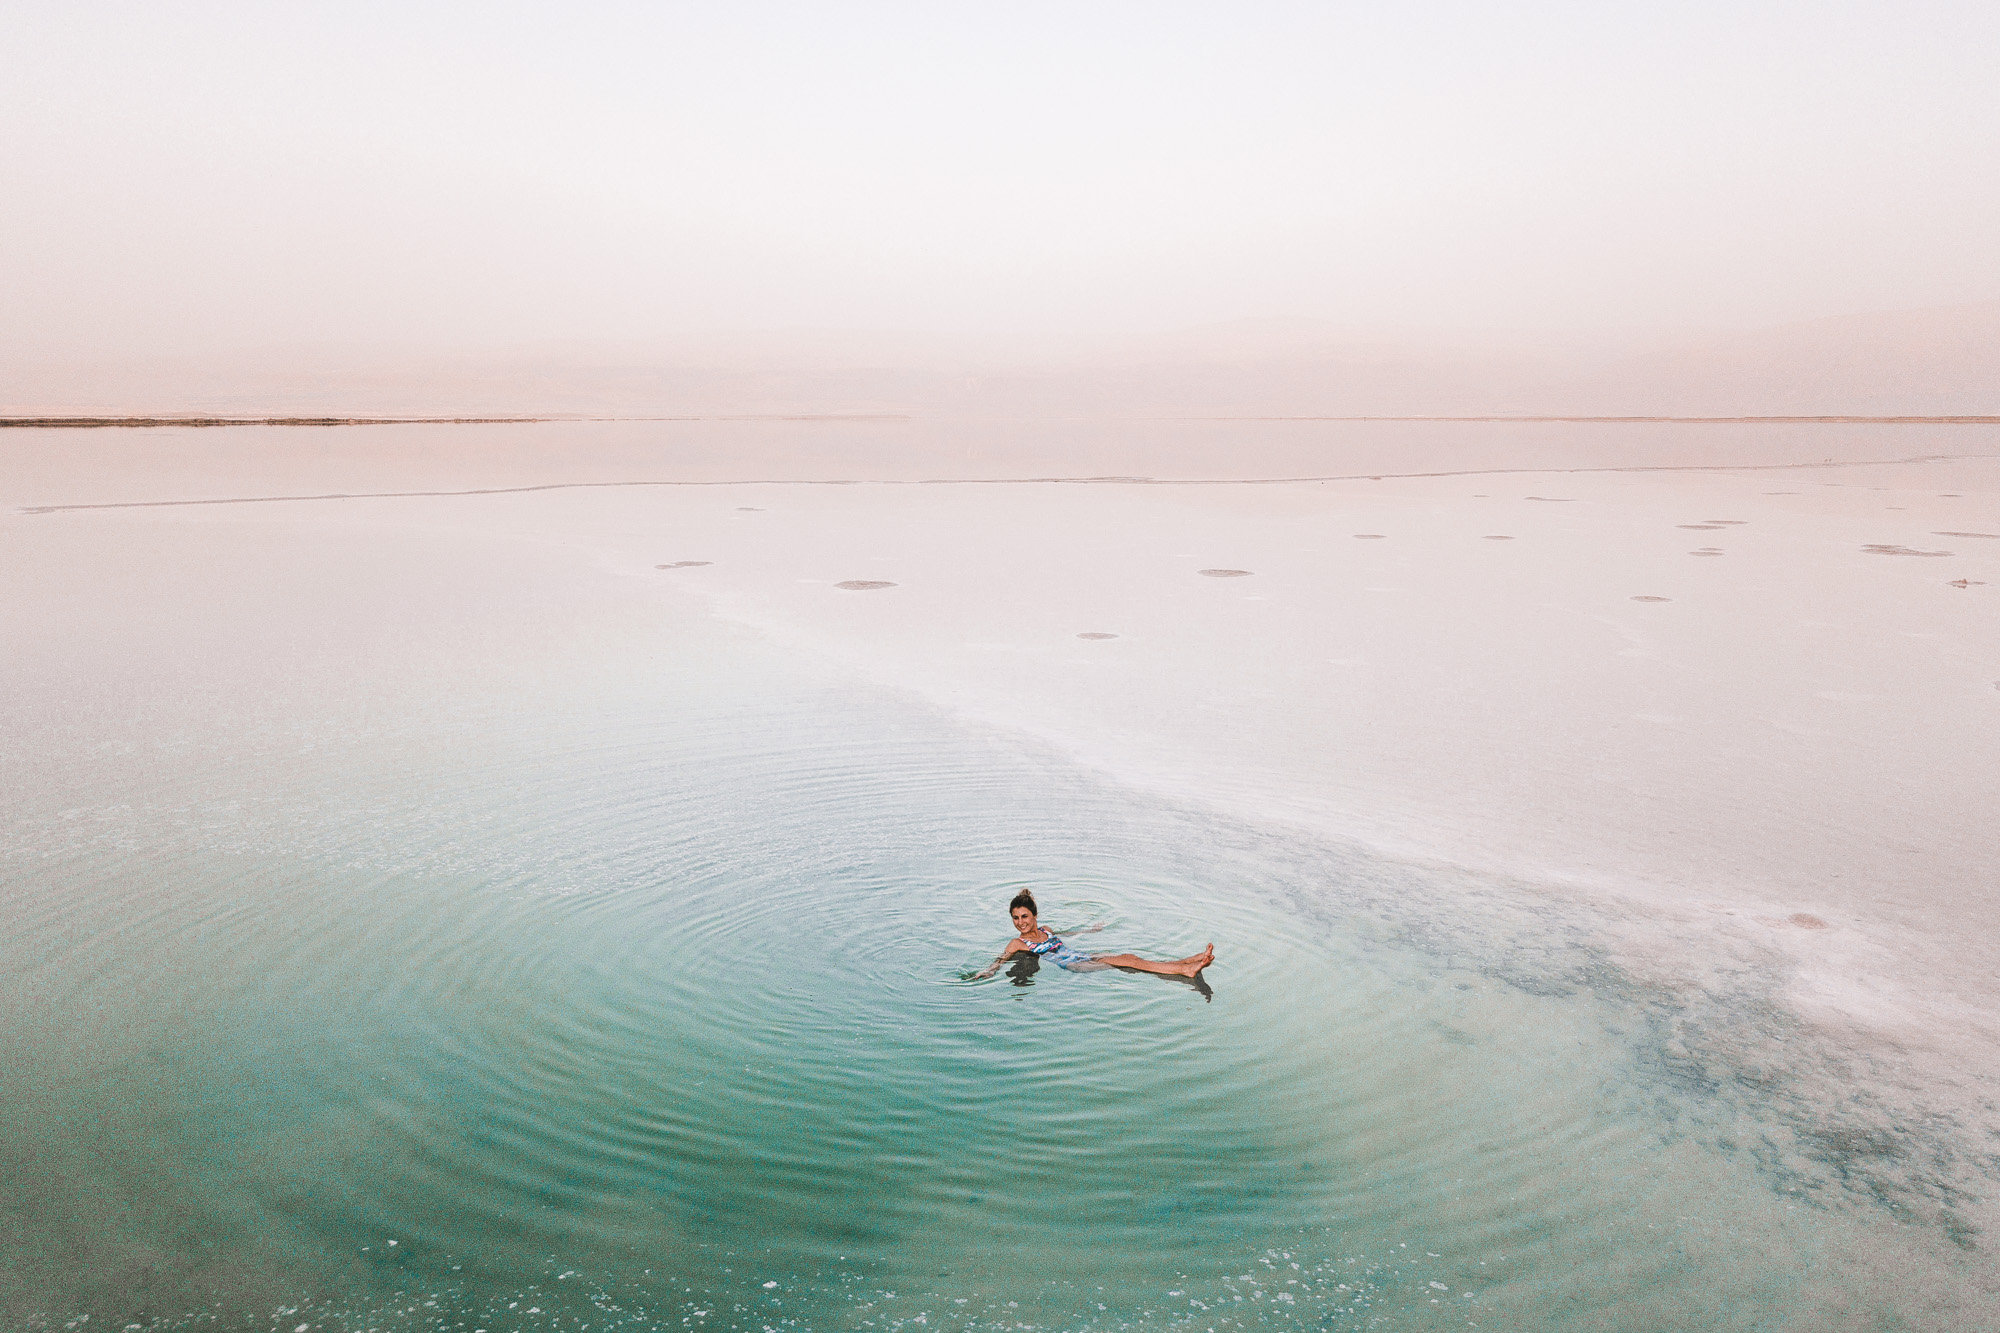
Shot with a DJI Mavic Pro drone in the Dead Sea, Israel | f/2.2 | 1/640 | ISO 100 | Edited with our Lightroom Presets
I hope you enjoyed this basic overview of how we shoot and edit for our blog and Instagram! If you’re stuck developing your own photography style, I recommend looking to others for inspiration. There are a lot of different styles out there, so try to determine what you first loved about a photo that made you save it (for instance on Pinterest or Instagram). Once you have a starting point, it’s always easier add your own unique look to it.
Pin me for later

Pingback: Lofoten, Norway Travel Guide - Find Us Lost
Pingback: From 9-to-5 Jobs to Travel Bloggers: Our 2 Year Update - Find Us Lost
Pingback: Introducing Our Lightroom Photo Presets! - Find Us Lost
Taylor Says
Thanks for the info team! Definitely took on some important info. Huge fan of your underwater work, so that’s cool to see how you do it! What settings would you recommend most for the GoPro underwater pics? Something we have struggled with for quality In the past!
Anna & Taylor (theconstanttravellers)
Jacob Says
Hi Taylor,
For shooting underwater, I use the burst mode and I have it set to take 30 photos in 6 seconds. I find that this gives me the best results as there are usually a handful of good shots within the 30. I would also highly recommend getting a dome if you are going to be trying over/under shots. Sometimes it can be a fair amount of trial and error, especially when you’re in the ocean on a windy day.
Pingback: Our Travel Photography Gear - Find Us Lost
Laurence Goldman Says
Hi: Really inspiring site. I’m immediately struck by the “look” and style of your stuff. I could go on and on-from the girly font (sorry) of your logo to your color aethetic to the “wide” portrait photo style choice. I like especially the hi-key, pastelly look with very sensitive skin tone renderings. Really impressive and difficult to come up with, so the whole things natural and not stiff and pretentious.
You mentioned you do a lot of cropping in post. Have you explored stitching and stretching? I’ve just come across and was wondering. I’d also love to see your film images in a separate portfolio. I’ve recently started lusting after a Leica M-3, Q, Contax G-2, Mamiya 711, and would like to see what you do.
Thanks
Selena Says
Post authorHi Laurence – thanks so much, really appreciate that!
We don’t use stitching or stretching. Jacob and I will play around with film from time to time, but now that we’re traveling full-time we have to be more selective with gear. All digital for us right now! ?
Marta Says
Hi guys! :] thank you so much for that post:) so much knowledge in here? I was wondering what laptop/screen do you use for editing? Planning to invest in a new laptop or stationary computer and would really appreciate some advice 🙂 thank you in advance. Greetings from Bonaire
Jacob Says
Hi Marta, we’re glad you found it useful!
Selena and I both edit on a MacBook Pro because Lightroom can be fairly intensive on a computer if you’re running other applications in the background. We also really love apple’s screens for resolution and color. You get more bang for your buck with the iMacs which are stationary, but we are on the road so much that didn’t make sense for us. Instead, we have a 5K monitor that we use to edit with our MBP when we’re home. There are also good PCs that can run Lightroom and other adobe apps if you prefer other brands.
When thinking about screens, I’d recommend around 3K resolution or more and you want a monitor that is known for good color accuracy. You can also get accessories and programs to “calibrate” your monitor’s color if you really want it to be industry perfect, but that is overkill for most people.
If you have any other questions or want me to elaborate on something just let me know.
-Jacob
Luke + Hayley Says
Got all your pointers on a post-it note now ? Thanks so much guys, so helpful!
Selena Says
Post authorGlad to hear it! Our pleasure. 🙂
Pingback: The Complete Israel Travel Guide - Find Us Lost
Jordan Says
Thanks so much for this helpful guide! Loved seeing what settings were were used to create all the different photos. I’m just starting out with photography, so these tips were super useful. Love your photos and your blog!
Selena Says
Post authorSo glad to hear it, thanks Jordan! 🙂
Lisa Says
Thank you so much for your camera guides! Do you guys use any lens filters? Looking into getting one or two – and figuring out what brands are best.
Jacob Says
Hi Lisa,
For most of our lenses, we keep a UV filter on the camera. These are mostly there to protect the lens (it’s a lot cheaper to replace a filter than a lens). Polarizers can be great for landscape shooting, I like Tiffen and B&W for brands.
Hannah Says
So much good info here!! Thank you!
For the shots you’re both in, do you carry your tripod with you everywhere? (e.g. the featured photo in your Amsterdam travel guide) If so, do you have a compact, travel-friendly one that you love? Are you ever nervous to set it up and leave it “unattended” for a moment?
Jacob Says
Hope it was helpful!
Generally, we take the photos of the two of us with this tripod: https://amzn.to/2jRAtcV. We have the carbon-fiber version since it’s lighter (easier to travel with) and we’ve customized the ball mount with a more robust mount.
So far we haven’t had any issues with leaving it while we set up a shot. As long as you use good judgment you should be ok!
Michael Fagan Says
I wish my Lightroom presets had such appealing names! You two definitely get some great shots on your travels!
Selena Says
Post authorThey are always a work in progress. 😉 Thanks Michael!
Leah | @thewanderleaf Says
Okay this was so helpful! I’ve been shooting in auto for so long but you’ve motivated me to try out manual
Jacob Says
That’s awesome! It will take some time to get used to it, so be patient, but it definitely pays off. Let us know if you have any additional questions as you’re trying it out.
Michael @ Mile in My Glasses Says
I saved this post before I even read it because I knew it would be a great one! Thank-you for all the information guys, this was fantastic! I’ve always been such a fan of your photography!
I hope you’re having a wonderful Monday,
Michael
https://www.mileinmyglasses.com
Selena Says
Post authorAww thanks Michael! Really love to hear that – hope it’s helpful to you. 🙂